Tag: Suneet Singal

  • How to Avoid Wasting Time on Scholarships That Don’t Fit

    How to Avoid Wasting Time on Scholarships That Don’t Fit

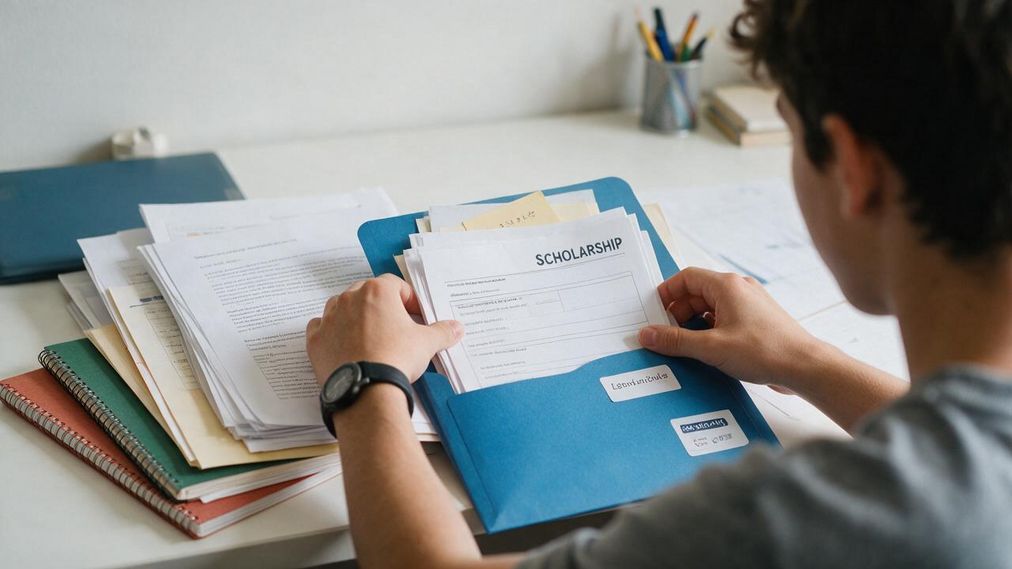
    A strong scholarship fit means you meet every eligibility rule, match the sponsor’s preferred applicant profile, and have a reasonable chance of earning enough money to justify the work. Filter opportunities before writing essays so your limited application time goes toward awards built for students like you.

    A scholarship portal can show hundreds or thousands of results, yet only a small share may deserve your attention. The solution isn’t submitting more applications at random. You need a repeatable way to compare eligibility, competition, effort, award value, and legitimacy before deciding where to invest your time.

    The High Cost Of Mass Scholarship Applications

    Applying to every scholarship you technically qualify for sounds productive, but the numbers can be misleading. A broad eligibility statement may place you in a large national applicant pool with students from many schools, majors, and regions. If the application also demands original essays, recommendation letters, transcripts, and extra documents, one weak match can consume hours. Repeat that process several times and scholarship fatigue arrives quickly.

    Mass applications also increase the risk of careless mistakes. You may miss an attachment, overlook a word limit, reuse the wrong school name, or submit an essay that only partly answers the prompt. Scholarship committees can reject an incomplete application regardless of the applicant’s grades or achievements. A smaller group of carefully selected applications usually gives you more time to review every requirement and submit polished material.

    Set a quality target instead of chasing a large application count. Your goal is to find awards where your qualifications align with the sponsor’s purpose. Ten carefully screened opportunities can deserve more attention than fifty generic listings. Measure progress by strong submissions completed, not forms opened.

    Build Your Scholarship Fit Filter

    Your scholarship filter should start with three areas: eligibility, applicant match, and practical value. Eligibility determines whether your application can be considered. Applicant match measures how closely you resemble the student the sponsor wants to support. Practical value compares the potential award with the time and materials required.

    Begin by creating a short applicant profile. Record your location, school year, intended major, career goal, grade range, activities, employment, community involvement, family employer affiliations, and relevant hobbies. Add any college, county, school district, professional association, or local organization connected to you. This profile becomes your search checklist.

    Rate each opportunity before opening a blank document. A strong scholarship fit meets every mandatory rule and several preferred qualities. A weak match only meets broad requirements, leaving you without a clear reason to stand out. If you can’t explain in one sentence why the sponsor would choose you, place the opportunity below better matches.

    Confirm Every Eligibility Rule Before You Start

    Read the complete eligibility page before studying the essay prompt. Sponsors often place important restrictions near the bottom of a listing or inside a separate application guide. You may need to attend a particular school, live in a certain county, study an approved subject, maintain a stated grade level, or have a specific affiliation. Missing one required condition can remove your application from consideration.

    Separate requirements into two groups: mandatory and preferred. Mandatory rules use firm wording and must be met. Preferred qualities can strengthen your application, but their absence doesn’t always disqualify you. When the wording is unclear, contact the sponsor before spending time on essays or recommendation requests.

    Check how the scholarship defines important terms. “Local student” could refer to your home address, high school, college, or permanent residence. “Entering student” may apply only to students beginning a program rather than current students changing majors. A five-minute eligibility review can prevent several hours of unnecessary work.

    Spot A Wasted Or Suspicious Application Early

    A legitimate scholarship should identify the sponsoring organization, explain the eligibility rules, describe the application process, and provide usable contact information. Be cautious when a listing promises guaranteed money, pressures you to respond immediately, or claims you won an award you never entered. Requests for payment, credit card details, or bank information during the search process are strong warning signs. Scholarships should not require you to pay a fee to claim an award.

    Sweepstakes-style offers require extra scrutiny. Some legitimate promotions use simple entry forms, but a form asking for extensive personal information without explaining selection standards may provide little value to you. Review the privacy terms, sponsor identity, judging method, and award history. If the main purpose appears to be collecting contact information, skip it.

    Use trusted starting points, including your school counselor, college financial aid office, established scholarship databases, community foundations, and recognized organizations. Search the sponsor’s name separately rather than relying only on the original listing. Confirm that the website, contact details, and application instructions agree. Don’t send sensitive information until you know who receives it and why it’s required.

    Choose Local And Niche Scholarships Before Broad Awards

    Large national scholarships attract attention because their award amounts are easy to notice. They can still deserve a place on your list, particularly when your qualifications match the sponsor’s stated goals. Yet broad eligibility can create a much larger applicant pool. You’re competing against students from many locations rather than a school, town, county, workplace, or professional group.

    Local scholarships often narrow the field through geographic or community requirements. Look at community foundations, civic organizations, local banks, employers, professional groups, school districts, and nearby nonprofit organizations. Ask your counselor or financial aid office about awards that aren’t promoted on major search platforms. A smaller award with fewer eligible applicants can offer better value than a large award open to nearly everyone.

    Niche scholarships narrow the pool through academic interests, career plans, hobbies, service records, family employment, or membership connections. Search using combinations rather than a broad phrase like “college scholarships.” Combine your county, major, career goal, activity, or employer connection with terms like “student scholarship” and “application.” The more precise the qualification, the easier it is to judge whether you belong in the intended applicant group.

    Calculate Your Time-To-Award Ratio

    The award amount alone doesn’t tell you whether an application deserves your time. Compare the money offered with the work required and the strength of your match. A smaller scholarship needing a short form and an existing essay may rank above a larger award requiring several original essays, multiple recommendations, and a project. Your expected return depends on fit and effort, not just the headline amount.

    Estimate how long the entire application will take. Include eligibility research, document collection, essay drafting, editing, recommendation coordination, form completion, and final review. Then assign the opportunity a fit rating based on how many narrow qualifications you meet. Prioritize applications that combine a strong match, manageable workload, credible sponsor, and useful award.

    Small awards can still be worth applying for. A modest award may cover books, supplies, transportation, or part of a college bill, especially when the application takes little time. Several smaller awards can also add up. Skip a small award only when the workload is excessive, the match is weak, or the terms prevent the money from helping with your expected costs.

    Use Your Specific Qualifications To Reduce Competition

    Your strongest opportunities often come from details that don’t appear important at first. A specific career goal, uncommon academic concentration, long-term activity, local connection, part-time employer, or community service record can place you in a narrower applicant group. These qualifications help sponsors identify applicants who match the purpose behind the award. Generic academic strength matters, but a precise match gives your application a clearer case.

    Review every organization connected to you or your family. Employers, labor organizations, professional associations, community groups, banks, religious organizations, alumni groups, and local clubs may sponsor education awards. Confirm each program’s current eligibility requirements directly with the organization. Some opportunities receive limited promotion outside the sponsoring group.

    Don’t stretch your history to fit an award. Scholarship reviewers can tell when an essay forces a weak connection to the sponsor’s mission. Choose opportunities where your experiences provide specific material for the prompt. If you can support your match with records, activities, goals, or sustained involvement, you can write with greater precision.

    Search Filtered Databases Instead Of Generic Lists

    Scholarship databases work best when you use detailed filters and keep your profile current. Enter your academic level, major, location, grade information, college plans, activities, and affiliations. Remove expired listings and opportunities that fail a mandatory requirement. Save only the results you plan to review within a set period.

    Generic search results often repeat the same national awards across multiple websites. Repetition can create the impression that you’ve found many opportunities when several pages lead to one application. Track the sponsor, deadline, award, requirements, and original application page in a spreadsheet. This prevents duplicate work and helps you compare opportunities side by side.

    Use precise search phrases outside scholarship portals as well. Search for awards connected to your college, county, major, career field, employer, and community organizations. Add terms like “eligibility,” “application,” or “financial aid” to reduce unrelated results. Open the sponsor’s official page whenever possible rather than submitting through an unknown directory.

    Check Your College’s Scholarship Portal First

    Your college’s financial aid office and scholarship portal should rank near the top of your search plan. Colleges may offer institutional scholarships funded by the school, departments, alumni, and donors. Some awards use information already held by the college, reducing the amount of material you need to submit. Others require a separate application but limit eligibility to enrolled or admitted students.

    Search beyond the main financial aid page. Review your academic department, honors program, student services office, alumni association, and college foundation. Ask whether one general application matches you with several internal awards. Confirm whether returning students must reapply each year.

    Institutional aid also belongs beside private scholarships in your funding plan. Complete the Free Application for Federal Student Aid (FAFSA) when applicable and follow every aid instruction from your college. Outside scholarships are one source of support, not the entire plan. Ask the financial aid office how an outside award may affect your existing aid package before accepting or declining funds.

    Reuse Strong Material Without Sending Generic Essays

    You don’t need to write every scholarship essay from the beginning. Build a personal library containing your strongest material about academic goals, career plans, leadership, community involvement, obstacles, achievements, and financial need. Keep shorter and longer versions of common responses. Store key dates, activity descriptions, grade information, and document files in one organized folder.

    Reuse ideas and selected passages, then revise them for the actual prompt. Change the opening, emphasis, supporting details, and closing so the essay answers the sponsor’s question. Remove references to other organizations or awards. A recycled essay that ignores the prompt saves drafting time but reduces application quality.

    Create a final review checklist for every submission. Confirm the sponsor’s name, essay topic, word limit, document format, deadline, recommendation status, and submission method. Read the instructions again after uploading your files. Careful reuse reduces work only when every application still feels written for its intended reader.

    Manage A Short, Ranked Scholarship Pipeline

    Keep three working categories: priority applications, quick applications, and low-priority possibilities. Priority opportunities offer your best combination of eligibility, match, credibility, award value, and manageable effort. Quick applications require little extra work and meet your standards. Low-priority listings stay on hold unless you finish stronger opportunities early.

    Limit how many active applications you manage at once. Your ideal number depends on schoolwork, employment, family commitments, and application complexity. Assign personal deadlines before the official due dates so you have room to solve document or recommendation problems. Review your list weekly and remove expired, suspicious, or weak-match opportunities.

    Track outcomes without judging your strategy only by wins. Record which applications reached finalist stages, which prompts were reusable, and which sources produced the strongest matches. Update your applicant profile as your grades, activities, college status, and career goals change. Better records make each future search faster.

    How Do You Know If A Scholarship Is Worth Applying For?

    • Meet every eligibility rule.
    • Verify that the sponsor is legitimate.
    • Compare the award with the work required.
    • Favor a narrow match and smaller applicant pool.
    • Skip vague, fee-based, or sweepstakes-style offers.

    Make Every Application Earn Its Place

    You avoid wasted effort by treating scholarship applications as ranked opportunities rather than an endless submission contest. Confirm eligibility first, measure your applicant match, compare the workload with the award, and verify the sponsor before sharing information. Give local, niche, and college-specific opportunities priority when they align closely with your record. Reuse strong material carefully, follow every instruction, and keep a short pipeline you can manage well. The best scholarship fit is the award where your qualifications give the sponsor a specific reason to choose you.


    References

  • How to Find Transferable Skills Hidden in Your Coursework

    How to Find Transferable Skills Hidden in Your Coursework

    You can find transferable skills in coursework by reviewing what you did, identifying the actions required, and translating those actions into language employers use. Papers, presentations, laboratory reports, group projects, problem sets, and capstones can all provide evidence of workplace skills.

    Your coursework counts as more than subject knowledge. It shows how you research, organize information, solve problems, use technology, communicate decisions, and work with other people.

    The process below helps you turn academic work into credible resume bullets, cover letter evidence, and interview answers. It also shows you how to match your experience to a job without overstating what you did.

    Why Coursework Already Counts As Real Experience

    Coursework gives you defined goals, deadlines, quality standards, and measurable outputs. Those conditions also appear in the workplace. When you complete a research paper, you interpret requirements, locate reliable information, evaluate evidence, organize findings, and deliver a finished product by a set date.

    The academic setting doesn’t erase the skills required to complete the work. A group presentation can demonstrate planning, communication, task coordination, conflict management, and public speaking. A laboratory report can show data collection, procedural accuracy, technical writing, and attention to detail.

    The strongest proof usually comes from assignments that required several decisions rather than simple recall. Look for projects where you selected a method, solved an unexpected problem, compared possible answers, or revised your work after receiving feedback. These details show an employer how you applied a skill rather than merely claiming to have it.

    What Employers Mean By Transferable Skills

    Transferable skills are abilities you can use across courses, jobs, industries, and work settings. Communication is transferable because you may use it in a classroom presentation, a customer meeting, a written report, or a project update. The subject changes, but the underlying ability remains useful.

    The National Association of Colleges and Employers (NACE) identifies career-readiness competencies that include communication, critical thinking, leadership, professionalism, teamwork, technology, and career development. These categories give you practical labels for abilities you may already have demonstrated through academic work.

    Transferable skills differ from technical skills, but the categories often overlap. Statistical software knowledge is technical, yet using that software to evaluate a question also demonstrates analytical thinking. Writing code is technical, yet documenting your code and explaining it to classmates shows communication and attention to users.

    Step 1: Build A Coursework Inventory

    Start by listing courses that relate directly or indirectly to the work you want. Under each course, record substantial assignments rather than copying the course description. Include papers, presentations, laboratory exercises, design projects, case analyses, simulations, portfolios, fieldwork, and team assignments.

    Write down what you produced, how you completed it, and any requirements you had to meet. Note the project length, team structure, tools used, type of research, audience, deadline, and final format when those details help explain the work. You don’t need to include every homework task.

    Prioritize assignments that contain strong evidence. A capstone completed over several months will usually give you more material than a short quiz. A team project may support claims about collaboration, yet it can also reveal research, scheduling, presentation, editing, and problem-solving skills.

    • Course: Name and subject area
    • Assignment: Paper, project, presentation, report, or simulation
    • Goal: What you were asked to accomplish
    • Actions: What you personally did
    • Tools: Software, equipment, databases, or methods used
    • Output: What you submitted, built, calculated, or presented

    Step 2: Extract Action Verbs And Skill Categories

    Review each assignment and circle the verbs that describe your work. Strong verbs include analyzed, calculated, compared, coordinated, designed, edited, evaluated, interpreted, organized, presented, researched, tested, and wrote. These verbs reveal the behavior behind the assignment.

    Group related actions into skill categories. Researched, verified, and synthesized can support research or analytical thinking. Presented, explained, and summarized can support oral or written communication. Coordinated, delegated, and reconciled can point to teamwork or leadership.

    Use precise labels rather than broad personality traits. Saying you’re hardworking tells an employer little about how you operate. Saying you managed overlapping deadlines for three course projects gives the employer a specific reason to associate your work with planning, reliability, and time management.

    You can also compare your actions with skills identified by established career resources. The World Economic Forum highlights analytical thinking, creative thinking, adaptability, self-awareness, and continuous learning among commonly valued abilities. CareerOneStop’s Skills Matcher can help you connect tasks from school, paid work, volunteering, and other experience to possible career paths.

    Step 3: Match Your Skills To Job Descriptions

    A skill becomes more useful in your application when it answers a requirement in the job description. Read the posting and underline repeated tasks, tools, and abilities. Pay attention to verbs because they show what the employer expects you to do.

    Create two columns, one for the employer’s requirement and one for your coursework evidence. If the job requires preparing reports, connect that requirement to research papers, laboratory reports, or project documentation. If it requires coordinating with team members, connect it to a group assignment where you managed responsibilities or combined contributions.

    The Occupational Information Network (O*NET) OnLine Skills Search can help when a posting uses vague language. You can review the skills associated with an occupation and compare them with your inventory. CareerOneStop offers another way to identify careers that use abilities you’ve already developed.

    Don’t force a connection when the evidence is weak. Completing one presentation doesn’t necessarily prove advanced public-speaking ability. It can support a more measured claim, such as experience organizing information and presenting findings to a classroom audience.

    Step 4: Translate Academic Language Into Workplace Terms

    Academic descriptions often focus on the assignment format rather than the value of the work. “Wrote a ten-page paper” tells an employer what you submitted, but it leaves out the research, analysis, structure, and deadline management required. Workplace language moves those actions to the front.

    A stronger description could read: “Researched and synthesized evidence from academic sources to produce a structured analysis of competing arguments.” This wording stays accurate while showing research, source evaluation, written communication, and analytical thinking. You haven’t turned the paper into a job; you’ve described the work in terms an employer can assess.

    Use a simple formula: action verb + task + method or tool + purpose or result. A biology project could become, “Collected and organized experimental data in spreadsheet software to compare results across test conditions.” A history presentation could become, “Evaluated primary and secondary sources and presented a supported argument to a classroom audience.”

    Results don’t always need percentages or financial outcomes. Your result may be a completed design, a tested model, a polished presentation, an approved proposal, or a report delivered by the deadline. Use numbers only when you can verify them from your records.

    Common Coursework Assignments And The Skills They Prove

    Research papers can demonstrate source evaluation, written communication, organization, synthesis, and deadline management. The strongest evidence comes from your method. Explain how you narrowed the topic, assessed source quality, compared claims, structured the argument, or revised the final draft.

    Presentations can show audience awareness, verbal communication, visual organization, and preparation. If you built slides, divided speaking responsibilities, answered questions, or adjusted technical material for a nontechnical audience, record those actions. They can become useful evidence for roles involving briefings, training, sales support, or client communication.

    Group projects often prove more than teamwork. They can show scheduling, delegation, file management, editing, negotiation, and accountability. Describe your personal contribution rather than taking credit for everything the group produced.

    • Laboratory reports: Data collection, procedural accuracy, analysis, documentation
    • Problem sets: Quantitative reasoning, method selection, error checking
    • Case analyses: Decision-making, comparison, evidence-based recommendations
    • Design projects: Planning, testing, revision, technical communication
    • Capstones: Project management, independent research, presentation, documentation
    • Reflective assignments: Self-assessment, feedback use, learning awareness
    • Class discussions: Active listening, concise communication, respectful disagreement

    How Different Subjects Build Transferable Skills

    A history course can develop research, source verification, argument construction, and written communication. Comparing accounts of the same event requires you to identify bias, assess credibility, and form a supported interpretation. Those abilities can transfer to research, communications, policy, operations, and administrative work.

    A biology course can build data analysis, procedural discipline, observation, technical writing, and teamwork. Laboratory work may also require you to follow detailed instructions, document changes, maintain organized records, and explain results. These abilities matter in roles where accuracy and repeatable processes shape the quality of the work.

    An engineering course can provide evidence of mathematical reasoning, design, testing, documentation, and project planning. A design assignment may require you to compare constraints, select materials, assess performance, and revise a model. The technical content matters, but your decision process often reveals the most transferable value.

    Courses that appear unrelated to your target field can still support your application. A literature seminar may strengthen textual analysis and discussion skills. An art course may show visual communication, critique, revision, and project planning. Focus on what you did and how that behavior connects to the role.

    How To Describe Group Projects Professionally

    Describe group work by separating the shared goal from your individual contribution. State what the team was expected to produce, then identify the tasks you owned. This prevents vague claims and gives an employer a clearer picture of your role.

    Instead of writing “Worked with a group on a marketing project,” explain the work: “Coordinated research assignments for a four-person team and edited individual contributions into one presentation.” The revised version shows coordination, editing, organization, and communication without exaggerating your authority.

    If the project involved disagreement, focus on the professional action you took. You may have clarified responsibilities, compared possible solutions, documented decisions, or adjusted the schedule. Avoid criticizing classmates or presenting routine cooperation as major conflict resolution.

    How To Use Coursework Skills On Your Resume

    You can place relevant academic work under headings such as Selected Projects, Academic Projects, or Relevant Coursework. A project section usually works better when you need to explain what you did. A coursework list can be useful when the course titles themselves show knowledge related to the position.

    Write project entries in the same clear style used for employment entries. Include the project or course name, followed by concise bullets describing your actions, tools, and outputs. Label the work as academic so the employer can understand where the experience came from.

    A resume bullet should connect evidence to the role you want. “Analyzed survey data using spreadsheet functions and summarized findings in a written report” gives an employer more information than “Completed a statistics project.” Choose two or three strong bullets rather than listing every task.

    Academic projects can appear in an experience section when the heading and labels remain accurate. You shouldn’t present coursework as paid employment or imply that a classroom client was a real external client. Honest labels do not weaken the work; they make your claims easier to trust.

    How To Use Coursework In Cover Letters And Interviews

    A cover letter gives you space to explain why a project relates to the employer’s needs. Choose one assignment with a clear connection to the position, then describe the goal, your actions, and the skill you developed. Keep the course title secondary to the work you performed.

    During interviews, structure your answer around the situation, task, action, and result. Spend most of your time on the action because that is where your abilities become visible. Explain what you decided, what method you used, how you handled a problem, and what you produced.

    Prepare several stories rather than relying on one large project. One assignment may demonstrate teamwork, another may show technical ability, and a third may prove written communication. This gives you flexible evidence for questions about deadlines, problem-solving, feedback, mistakes, and collaboration.

    You can also explain how the skill will transfer. After describing the academic example, connect the behavior to the job: “That project strengthened my ability to organize complex information and present the main findings concisely, which relates directly to preparing weekly project updates.” The connection should be short and specific.

    Common Mistakes That Weaken Coursework Evidence

    The first mistake is naming a skill without proof. Terms such as leadership, communication, and critical thinking become more credible when you attach them to an action. Replace “strong leadership skills” with a description of how you assigned tasks, tracked progress, or brought several contributions into one final product.

    Another mistake is copying academic language that an employer may not understand. Course codes, internal assignment names, and discipline-specific terms can hide the value of your work. Use plain language unless the technical term appears in the job description or matters to the occupation.

    Overstating your ability creates another problem. One introductory coding assignment doesn’t make you an advanced software developer. It can show foundational programming knowledge, debugging practice, persistence, or the ability to learn a new tool.

    A long list of generic skills also weakens your application. Select the abilities that match the role and support each one with strong evidence. A few well-documented skills usually communicate more than a crowded skills section filled with unsupported claims.

    Quick Skill-Mapping Template

    Use the template below for each substantial assignment. Write short notes first, then turn the strongest material into resume bullets and interview stories. Your goal is to preserve enough detail to prove what you did.

    • Assignment: What did you create, study, test, or present?
    • Goal: What outcome did the assignment require?
    • Actions: Which steps did you personally complete?
    • Tools: Which software, equipment, sources, or methods did you use?
    • Obstacle: What problem, limit, or change did you manage?
    • Output: What did you deliver or complete?
    • Skill: Which workplace ability does the evidence support?
    • Job Match: Which requirement in the posting uses that ability?

    Turn your notes into one sentence using an action verb, task, method, and output. Keep the statement accurate, remove unnecessary course details, and use wording that matches the employer’s terminology. Review the sentence once more and ask whether every claimed skill can be defended in an interview.

    How Do You Find Transferable Skills From Coursework?

    • List each assignment and its action verbs.
    • Map the actions to communication, problem-solving, teamwork, or technical skills.
    • Rewrite each skill in workplace language with a concrete course example.

    Turn Academic Work Into Credible Career Evidence

    You don’t need to hide the academic origin of your experience. Build an inventory, identify your actions, match them to job requirements, and translate them into direct workplace language. The best transferable skills in coursework are the ones you can support with a specific assignment, decision, method, or output. Keep your claims accurate and tailor the evidence to each role. When you describe the work rather than dismissing it as “just a class project,” employers can see what you already know how to do.


    References

  • How to Build a Scholarship Application Folder Before You Start Applying

    How to Build a Scholarship Application Folder Before You Start Applying

    Build a scholarship application folder by creating one secure master system for your reusable information, documents, essays, recommendation materials, and deadlines. Preparing this folder before you apply helps you complete applications faster, avoid missing information, and submit more accurate answers.

    A promising scholarship can become stressful when its deadline is close and your materials are scattered across email accounts, drawers, and school portals. Your scholarship master folder solves that problem by letting you complete the administrative work once, then reuse and adapt it for future applications.

    This guide shows you how to choose an organization system, gather official records, create a brag sheet, prepare recommenders, manage essays, and protect sensitive information. The goal is to turn repeated application tasks into a controlled process that’s easier to manage.

    Step 1: Understand Why Early Preparation Matters

    Scholarship applications often request the same core information in slightly different formats. You may repeatedly enter your contact details, academic history, activities, awards, employment, volunteer service, and future plans. A scholarship application folder keeps those details in one place, reducing the need to search for them every time. It also lowers the risk of entering conflicting dates or descriptions across applications.

    Early preparation becomes especially useful when a scholarship requires documents that you can’t produce immediately. A school office may need time to prepare a transcript, and a teacher may need several weeks to write a thoughtful recommendation. Score reports and financial records may also require extra steps to locate or request. Gathering these materials before a deadline gives you time to review them for missing pages, outdated information, or errors.

    Your folder should function as a working application center rather than a storage box. You’ll use it to copy accurate information, compare requirements, adapt essays, and monitor submissions. When a suitable opportunity appears, you can focus on the scholarship’s specific questions instead of rebuilding your application materials from scratch.

    Step 2: Choose A Digital, Physical, Or Hybrid System

    A digital folder is usually the most practical primary system because scholarship applications are commonly completed online. You can access a cloud-based folder from a computer or phone, share selected files with a parent or guardian, and create backups without carrying paper records. A reputable cloud storage service also makes it easier to search filenames and upload documents directly into an application portal.

    A physical binder still has value when you receive paper records or prefer reviewing printed materials. Use labeled dividers for academic records, financial documents, activities, recommendations, essays, and submitted applications. Store the binder in a secure location rather than carrying it to school every day. Sensitive records should never sit unattended in a backpack, car, library, or shared study area.

    A hybrid setup works well for many students. Keep your active scholarship application folder online, then use a physical binder for original certificates, sealed records, and documents that haven’t been scanned. Don’t rely on a single flash drive as your only digital copy because it can be lost, damaged, or corrupted. Maintain a secure backup and confirm that you can open your files before application season begins.

    Step 3: Create Your Master Data Sheet

    Your master data sheet is a private reference document containing answers you’re likely to enter repeatedly. Include your legal name, preferred contact information, mailing address, school details, graduation information, employment history, and basic family information when relevant. Add the dates associated with your jobs, activities, leadership positions, awards, and volunteer work. Accurate dates prevent small inconsistencies from appearing across multiple applications.

    Organize the sheet with short headings so you can find details quickly. Useful headings include personal information, education, employment, activities, service, honors, career goals, intended field of study, and financial aid information. Write complete organization names before using shortened forms. Keep descriptions concise enough to fit applications with strict character limits.

    Don’t place every sensitive identifier in an ordinary document. Social Security numbers, tax records, and financial details need stronger protection than your activity list or mailing address. Store sensitive files in a restricted folder with a strong password and limited sharing permissions. Enter private data directly into verified application or financial aid portals rather than copying it into emails or unsecured forms.

    Step 4: Gather Your Official Documents

    Create a dedicated records folder for transcripts, standardized test score reports, financial documents, and identification materials requested by verified programs. Save unofficial copies for reference, but check whether a scholarship requires an official version sent by your school or testing provider. Labeling the two versions correctly prevents you from uploading an unofficial record where an official report is required. It can also help you avoid paying for official reports before you know they’re necessary.

    Ask your school how transcript requests work and how much processing time the office needs. Save a blank transcript request form if your school uses one, along with the correct office email address and submission instructions. Review your transcript after receiving it so you can report your courses, grade point average, and academic honors consistently. If something appears incorrect, contact the appropriate school office early rather than waiting until a deadline.

    Keep Free Application for Federal Student Aid (FAFSA) information separate from ordinary scholarship files. Federal Student Aid guidance recommends gathering relevant tax information, Social Security numbers, and other required financial records before beginning the aid process. Use a clearly labeled restricted folder for these materials, and give access only to the people helping you complete the form. Scholarship applications that request proof of financial need may use different documentation, so read their instructions before uploading tax or aid records.

    Step 5: Build Your Brag Sheet And Activity Log

    A brag sheet is a detailed record of your achievements, responsibilities, interests, and experiences. It gives counselors and recommendation writers the information they need to describe you accurately. Your sheet can include academic honors, extracurricular activities, leadership roles, employment, family responsibilities, community service, special projects, and relevant skills. Add short notes explaining what you did instead of listing organization names alone.

    Use measurable details whenever your records support them. Record the number of service hours you completed, how long you held a position, how often you participated, and what responsibilities you handled. “Helped at a food pantry” gives a reviewer little information, but a description of your regular tasks and documented service period shows the scope of your work. Don’t estimate numbers when you can confirm them through schedules, logs, certificates, or a program coordinator.

    Create a separate activity log and update it during the school year. Include the organization, supervisor or adviser, contact information, start and end dates, total hours, duties, and available proof. Proof of community service may include a signed verification letter, official service log, completion certificate, or confirmation from the organization. Check the scholarship’s rules because providers can define acceptable proof differently.

    Step 6: Prepare A Recommendation Package

    A strong recommendation request gives the writer enough information and time to produce a specific letter. Prepare a recommendation package containing your student resume, brag sheet, academic interests, career goals, scholarship description, submission instructions, and deadline. Add a short note explaining why you selected that person. This helps the writer connect your experiences to qualities they have personally observed.

    Maintain a recommendation tracker with the writer’s name, contact information, request date, scholarship name, deadline, submission method, and current status. Some letters are uploaded through private portals, and others are sent by email or mail. Record the correct process for every scholarship rather than assuming one letter can be submitted the same way everywhere. If a paper submission is required, provide the necessary form and a properly addressed envelope.

    Ask well before the deadline and communicate your request politely. A teacher or counselor may be supporting many students at the same time, so a clear package reduces unnecessary follow-up messages. Send a brief reminder only when needed, and confirm when the scholarship system records the letter as received. Keep the writer’s contact details in your folder, but don’t save or distribute a confidential letter unless the writer has provided it directly for that purpose.

    Step 7: Draft Your Universal Anchor Essays

    Anchor essays are polished personal stories that you can adapt to related scholarship prompts. Prepare two or three drafts covering recurring subjects: your educational goals, a meaningful service experience, a leadership lesson, a challenge you handled, or the reason you chose your field of study. These drafts give you quality source material without forcing you to write every response from a blank page. They also help you maintain consistent facts across applications.

    Store a clean master copy of every essay before adapting it. Create a duplicate for a specific scholarship, rename the new file, and revise that copy to match the prompt and word limit. This prevents you from accidentally replacing your strongest original draft with a shortened version. A useful filename can include the scholarship name, essay subject, word limit, and revision status.

    Reusing an essay doesn’t mean submitting the same response everywhere. Read the prompt closely and adjust the opening, emphasis, supporting details, and closing point. Remove references to another organization before uploading the file. Keep a document containing shorter versions of common answers too, since many application forms use character limits rather than traditional essays.

    Step 8: Organize Supporting Artifacts

    Some scholarships request evidence of creative work, technical projects, service, leadership, athletics, or other accomplishments. Create an artifacts folder for certificates, photographs, writing samples, project summaries, presentation slides, and approved video links. Save only materials that you have permission to share. A large collection isn’t useful if you can’t identify what a file contains or when it was created.

    Scan paper records into Portable Document Format (PDF) files using a document scanner or a trusted scanning application. Check every scan for readability, correct page order, and complete edges. Use descriptive filenames rather than labels like “scan001” or “newdocument.” If an application requests one combined file, use a PDF merger and review the finished document before submitting it.

    Create a short inventory that connects every artifact to an accomplishment on your resume or brag sheet. Record the file location, date, organization, and any submission restrictions. Portfolio-based applications may limit file size, file type, video length, or the number of samples. Keep smaller copies ready, but preserve your original files at their best available quality.

    Step 9: Build A Deadline And Submission Tracker

    Your folder needs a tracker that shows what requires attention and when. A spreadsheet can include the scholarship name, award requirements, deadline, application link, essay prompt, recommendation status, transcript status, submission date, and result. Sort the sheet by deadline so urgent work stays visible. Add a personal target date several days before the official deadline to leave room for technical problems or missing documents.

    Break large applications into smaller tasks rather than recording only the closing date. Your task dates can cover eligibility review, transcript request, recommendation request, essay draft, essay review, document upload, and final submission. This makes progress easier to measure and exposes delays before they become emergencies. Mark any requirement that depends on another person so you can request it early.

    Save proof after you submit an application. Keep confirmation emails, submission receipts, completed application copies, and portal screenshots when appropriate. Record whether additional steps remain, including recommendation uploads or follow-up forms. Don’t assume an application is complete until the provider’s system confirms that all required components have been received.

    Step 10: Maintain Security And Avoid Scholarship Scams

    Review your scholarship application folder regularly and remove outdated duplicates. Update your grade information, activity log, resume, service hours, awards, contact details, and essay drafts as new information becomes available. Set a recurring monthly review during your active search period. A short maintenance session prevents the folder from becoming another disorganized archive.

    Protect your account with a unique password and available security controls. Limit folder access, check shared links, and avoid storing sensitive materials on public or school computers. Don’t email tax records, Social Security numbers, or identification documents unless you have verified the recipient and submission method. Delete temporary downloads from shared devices after confirming that your files are safely stored.

    Treat unexpected requests for payment, bank account information, or urgent personal data with caution. Verify the scholarship provider through its official website and read the application requirements before sharing private records. The Federal Trade Commission provides guidance for recognizing scholarship and financial aid scams. If a request doesn’t match the stated application process, stop and confirm it through an independently verified contact method.

    What Should Be In A Scholarship Application Folder?

    • A master data sheet with personal details
    • Transcripts and test score reports
    • A student resume or brag sheet
    • Two or three adaptable anchor essays
    • Recommendation contacts and deadlines

    Turn Your Folder Into An Application Launchpad

    A well-built scholarship application folder gives you control over repeated questions, document requests, essay drafts, and approaching deadlines. Start with a secure digital system, then add a physical binder if you need to preserve original records. Keep your master data sheet accurate, maintain your brag sheet, and give recommenders an organized package with clear instructions. Track every application through confirmation rather than stopping after you press submit. When your scholarship application folder stays current, you can spend less time searching for files and more time tailoring strong responses to the opportunities you choose.


    References

  • How to Ask Better Questions in Virtual Office Hours

    How to Ask Better Questions in Virtual Office Hours

    Better virtual office hours questions are specific: they show what you tried, identify the exact point where you got stuck, and ask for the next useful step. If you prepare your virtual office hours questions before you join, you’ll get clearer answers and spend less time sitting in awkward silence.

    You log into a video meeting, your professor asks, “What questions do you have?” and your mind goes blank. That freeze doesn’t mean you’re careless or unprepared. It usually means your confusion is still too broad to turn into a useful academic conversation.

    This guide shows you how to prepare before the meeting, ask sharper questions during the session, and follow up when the first answer still doesn’t click. You’ll also learn what to avoid, how to handle online meeting friction, and how instructors can make virtual office hours easier for students to use.

    Why Virtual Office Hours Feel Different

    Virtual office hours feel different because the usual classroom signals are harder to read. You can’t always tell when someone is about to speak, whether your professor is waiting for you, or whether another student has the same question. That makes a simple moment feel bigger than it is. The screen turns a normal pause into pressure.

    Silence also works differently online. In person, you might glance at your notebook, point to a worksheet, or ask a quick side question before the conversation starts. In a video meeting, you often enter a waiting room, appear in a square, and get asked for your question right away. If you haven’t prepared one, “I’m confused” becomes the only sentence available.

    The goal isn’t to sound polished. The goal is to make your question easy to answer. Professors and teaching assistants can help faster when you show the specific reading, problem, draft section, lecture slide, or assignment instruction that caused trouble. That turns office hours from a vague help session into a focused working conversation.

    Prepare Before You Join: A Pre-Meeting Checklist

    Strong questions usually start before the meeting. Spend a few minutes reviewing the assignment, lecture notes, readings, rubric, or problem set before you log in. Mark the exact place where your understanding breaks down. If you can point to one paragraph, step, sentence, theorem, prompt, or data result, you’re already closer to a better answer.

    Attempt the task before asking for help. That doesn’t mean you need to get it right. It means you need something to discuss: a draft paragraph, a solved step, a false start, a confusing source, or a short list of choices you’re weighing. When you bring an attempt, your professor can diagnose the issue instead of guessing where you are.

    Use this quick checklist before joining:

    • Write the assignment, topic, or reading you want to discuss.
    • Identify the exact spot where you got stuck.
    • Bring one attempt, note, draft section, or problem step.
    • Decide what kind of help you need: clarification, feedback, direction, or practice.
    • Prepare one follow-up question in case the first answer helps but doesn’t fully land.

    Turn “I’m Confused” Into A Specific Question

    “I’m confused” is honest, but it doesn’t give your instructor enough to work with. A better question names the topic, the attempt, and the part that isn’t making sense. You don’t need perfect academic language. You need a question that shows where the conversation should begin.

    Instead of saying, “I don’t understand the assignment,” say, “I understand that the paper needs an argument, but I’m not sure whether my thesis is specific enough.” Instead of saying, “I don’t get this problem,” say, “I used the formula from class, but my answer changes when I substitute this value.” That small shift gives your instructor a clear target.

    Helpful virtual office hours questions often use observable details. Point to a sentence, step, slide, graph, source, instruction, or comment. Share your screen if that helps. If you’re using chat, paste a short excerpt or describe the location so the instructor can find it quickly.

    A Simple Three-Part Question Formula For Office Hours

    Use this structure when you don’t know how to begin: name the task, explain what you tried, then ask what you need next. This keeps your question short without stripping away the details your instructor needs. It also helps you sound prepared, even when you’re genuinely stuck.

    Here’s the pattern: “I’m working on [task]. I tried [specific attempt]. I’m stuck at [specific point]. Could you help me figure out [next step]?” You can use it for essays, problem sets, lab work, coding assignments, readings, presentations, or exam review. It’s flexible enough for quick chat questions and longer one-on-one meetings.

    Try these sentence starters:

    • “I’m working on the discussion post, and I’m unsure whether this evidence supports my claim.”
    • “I tried solving this step two ways, but I keep getting different answers.”
    • “I understand the definition, but I’m having trouble applying it to this reading.”
    • “Could you look at this paragraph and tell me whether the main point is clear?”
    • “What should I review before attempting the next set of problems?”

    How To Ask Follow-Up Questions That Deepen Understanding

    A follow-up question is not a sign that you weren’t listening. It shows you’re checking your understanding in real time. If the first answer helps but still feels fuzzy, say exactly which part became clearer and which part still needs work. That helps your instructor adjust the explanation instead of repeating the same answer.

    Use follow-ups that ask for comparison, process, or next action. You can ask, “How can I tell when this method applies?” or “What clue in the prompt should point me toward that step?” You can also ask, “Could you walk through one more step with me, then let me try the next one?” These questions move you from receiving help to practicing with guidance.

    If you still don’t understand, avoid apologizing repeatedly. A simple, direct sentence works better: “I’m following the first part, but I lose the thread when we move to this step.” That gives your instructor useful information. It also keeps the conversation focused on learning rather than embarrassment.

    What Not To Ask In Virtual Office Hours

    Some questions make it hard for your professor to help because they are too broad, too last-minute, or too close to asking for the answer. “Can you explain everything?” is usually too wide for a short office hour visit. “What did I miss?” can also be hard to answer if you haven’t reviewed the material. Narrow the request before the meeting.

    Don’t ask your instructor to redo the full lecture, summarize an entire reading you skipped, or tell you exactly what grade you’ll get before work is submitted. You can ask for direction, clarification, feedback, and practice. You can ask whether your reasoning is on track. You can ask what to study next.

    Replace dead-end questions with useful versions:

    • Instead of “Can you explain the whole chapter?” ask, “Which part of this chapter should I focus on to understand the lecture problem?”
    • Instead of “Is this good?” ask, “Is my claim specific enough for the assignment prompt?”
    • Instead of “What’s going to be on the exam?” ask, “Which kinds of problems should I practice to prepare for this topic?”
    • Instead of “Can you fix my draft?” ask, “Could you review whether this paragraph connects evidence to the main claim?”

    Handling Silence, Tech Glitches, And Waiting Rooms

    Online meetings add small barriers that can make questions feel harder than they are. Your microphone may be muted, your professor may be checking the waiting room, or another student may be typing in chat. Don’t treat every pause as a failure. A short pause can give everyone time to think and respond more carefully.

    If you join late, keep it simple: “Sorry for joining late. I’ll listen first, then ask if there’s time.” If other students are present, ask whether it’s okay to share your question aloud or use chat. If your question includes personal grade concerns or sensitive academic planning, ask whether you should schedule a separate one-on-one meeting.

    Use meeting tools to reduce pressure. The chat box is useful for short questions, links, file names, page numbers, and problem steps. Screen sharing works well when you need help with a draft, code, slide, graph, or calculation. The hand-raise button can help you enter the conversation without interrupting, especially in group office hours.

    Better Virtual Office Hours Questions For Common Situations

    If you don’t have a specific question yet, ask for help finding one. You can say, “I reviewed my notes, and I know this topic is weak for me, but I’m not sure how to locate the problem. Could you help me identify what I should practice?” That is still a useful question because it gives the instructor a starting point.

    If you want feedback on a draft, ask about one feature at a time. Focus on the thesis, organization, use of evidence, clarity, citation practice, or alignment with the prompt. Broad requests like “Can you look this over?” often lead to general comments. Focused requests get sharper feedback.

    If you’re preparing for an assessment, ask about practice strategy instead of asking for the answers. You can ask, “What types of mistakes do students often make with this topic?” or “Which practice problems best match the skill we’re expected to use?” These virtual office hours questions help you study with direction rather than guessing what matters.

    For Instructors: Making Virtual Office Hours More Question-Friendly

    Students often avoid office hours because they don’t know what counts as a good question. You can lower that barrier by giving students question stems before they arrive. A few prompts in the course site, announcement, or meeting description can change the tone: “Bring one step you tried,” “Bring one confusing sentence,” or “Bring one decision you’re unsure about.”

    Wait time matters in online spaces. Research on classroom questioning has shown that a brief pause after a question can support longer, more thoughtful student responses. In virtual office hours, that pause may feel awkward, but it gives students time to unmute, check notes, type, or gather their words. Say, “Take a few seconds,” so silence feels intentional rather than tense.

    Offer multiple ways to participate. Some students ask better questions through chat before they feel ready to speak. Others need screen sharing, a shared document, or a quick agenda at the start of the meeting. When you invite students to show what they tried and where they got stuck, office hours become easier to use and easier to teach from.

    What Should You Ask During Virtual Office Hours?

    • Show one attempt and ask where it went wrong.
    • Ask for feedback on one draft section.
    • Ask what to practice next.
    • Ask about common mistakes on the current topic.

    Make The Meeting Easier Before You Log In

    Better questions don’t appear out of nowhere once the meeting starts. They come from reviewing the task, making an attempt, naming the exact point of confusion, and asking for a useful next step. If you’re nervous, write your first sentence before you join and keep it visible on your screen. If the answer doesn’t fully click, ask a follow-up that names the part you understand and the part that still feels unclear. With a little preparation, virtual office hours questions become less about sounding smart and more about getting the help you came for.


    References

  • How to Write Discussion Board Posts That Add Something Useful

    How to Write Discussion Board Posts That Add Something Useful

    Useful discussion board posts move the class conversation forward by making one specific point, supporting it with course material or a relevant example, and inviting a thoughtful reply.

    If you’ve ever stared at an empty reply box knowing that “I agree” won’t be enough, you’re dealing with the real problem: online class discussions reward contribution, not just participation. A useful post doesn’t need to sound stiff or overly formal. It needs to show that you read, thought, connected, and gave someone else a reason to respond.

    What Makes Discussion Board Posts Useful?

    A useful discussion board post adds something the conversation did not already have. That can be a new connection, a clearer explanation, a course concept, a practical example, a respectful question, or a reasoned disagreement.

    Most weak posts fail because they repeat the prompt, summarize the reading without analysis, or praise a classmate without adding substance. A useful post does more work. It shows what you understood, where your thinking changed, and how the topic connects to the class goal. Professors often look for contribution to the learning community, critical thinking, course connections, timeliness, and clear writing.

    You don’t need to sound like a published scholar to write well in an academic discussion forum. You need to be specific. Instead of saying, “The reading was interesting,” name the idea that mattered and explain why it matters. Specificity turns a required post into a meaningful discussion contribution.

    How Do You Start When You Don’t Know What To Say?

    Start by reading the prompt, the required material, and a few existing replies before you write. Then look for one place where you can add a connection, clarification, question, or application.

    When the prompt feels vague, break it into smaller parts. Ask yourself what the instructor is really asking you to do: explain a concept, compare ideas, apply a theory, evaluate an argument, or connect the reading to a real situation. Once you identify the task, your post becomes easier to shape. You’re no longer trying to “say something smart”; you’re answering a specific academic move.

    If other students already covered the obvious points, don’t panic. You can build from what’s already there. Choose one reply and extend it with a related course term, a different interpretation, or a practical implication. A good discussion board reply often starts with the classmate’s idea, then adds one fresh layer.

    How Do You Make One Substantive Point Without Rambling?

    Choose one main idea and develop it fully instead of covering every possible angle. A substantive discussion post is usually focused, connected, and easy to follow.

    A simple pattern works well: state your point, explain your reasoning, connect it to the course, and invite response. This keeps your writing from becoming a loose collection of thoughts. It also helps your professor see the thinking behind your answer. If your paragraph wanders into three separate topics, split the ideas and keep the strongest one.

    Length matters less than usefulness, unless your course gives a required word count. A short post can be substantive if it makes a precise claim and supports it well. A long post can still be weak if it repeats the reading or fills space without analysis. Use the course rubric as your guide when the instructor gives one.

    How Do You Support Your Point With Course Material?

    Support your point by connecting it to a reading, lecture idea, assigned concept, or relevant example. Evidence shows that your post is grounded in the course instead of based only on quick opinion.

    You don’t always need a formal quotation. Sometimes a paraphrase with a clear mention of the reading, author, module, or course concept is enough, depending on your instructor’s rules. If your class requires citations, follow the required citation style and include enough information for the reader to find the source. When no style is specified, use a clear course reference and keep the focus on your own analysis.

    Personal experience can be useful, but it should not replace course thinking. Connect the experience back to the topic being studied. If you describe a workplace habit, community issue, classroom moment, or media example, explain how it confirms, complicates, or challenges the assigned concept. That connection is what makes the example academic.

    How Do You End With A Question That Moves The Discussion Forward?

    End with an open question that gives classmates a clear path to respond. A good question asks them to analyze, compare, apply, or reconsider the topic.

    Weak closing questions are too broad or too easy to answer with yes or no. “What do you think?” can work in casual conversation, but it often gives classmates too little direction. A stronger version names the issue you want them to address. Ask about a tradeoff, a different case, an exception, or a possible consequence.

    Try questions that invite reasoning. You could ask, “How would this concept apply if the situation involved a smaller organization?” or “Which part of the author’s argument seems hardest to use in practice?” These questions don’t force agreement. They create room for better peer response and deeper threaded discussion.

    How Do You Reply To Classmates Without Saying “I Agree”?

    Reply by acknowledging the classmate’s point and then adding a new idea, example, question, or course connection. Agreement is fine, but it should be the starting point, not the whole reply.

    A stronger reply can begin with a specific reference to what your classmate wrote. Name the idea you’re responding to, then extend it. You might add a related concept from the module, compare it with another reading, or ask how their point would work in a different case. That turns a basic peer response into an evidence-based reply.

    You can also disagree without sounding rude. Focus on the idea, not the person. Use phrases like “I read that part differently,” “Your point made me think about another possibility,” or “I’m not sure the same conclusion fits every case.” Respectful disagreement often creates the best online class discussion because it gives everyone something specific to examine.

    What Does A Weak Post Look Like Compared With A Useful Post?

    A weak post usually repeats, praises, or reacts without explaining much. A useful post adds reasoning, support, and a question that keeps the conversation open.

    Weak: “I agree with your post. The reading was interesting, and I think communication is important. Great job.” This reply is polite, but it does not add a new idea. It also does not connect to a course concept or give the classmate anything specific to answer. The professor may see participation, but not much contribution.

    Useful: “Your point about communication connects well to the module’s discussion of feedback loops. I think the strongest part of your post is the idea that communication problems often appear after a process has already failed. That made me wonder whether teams should review communication patterns before a project begins, not only after mistakes happen. How would you apply that idea to a team with limited time?” This version acknowledges the classmate, adds a course connection, develops a point, and ends with a focused question.

    How Do You Add Value To A Discussion Board Post?

    • Read the prompt and replies.
    • Make one specific point.
    • Connect it to course material.
    • Ask an open follow-up question.

    Make The Reply Box Easier To Fill

    Writing better discussion board posts gets easier when you stop treating the assignment as a word-count task and start treating it as a conversation with academic purpose. Read what’s already there, choose one useful point, support it with course material, and give classmates a reason to respond. If you’re short on time, focus on being specific rather than sounding elaborate. A clear, connected, respectful post will almost always add more value than a long post that circles the prompt without moving the discussion forward.


    References

  • How to Build a Weekly Routine for Asynchronous Courses

    How to Build a Weekly Routine for Asynchronous Courses

    An effective asynchronous course routine replaces missing class meetings with fixed weekly study blocks, early personal deadlines, and a short review ritual. You succeed by giving each course a predictable place in your calendar before the week gets crowded.

    Asynchronous courses give you freedom, but freedom can turn into Sunday-night panic when readings, videos, discussion posts, quizzes, and assignments all land at once. This guide shows you how to build a weekly study schedule for online classes that fits around work, family, and other commitments without relying on last-minute motivation. You’ll learn how to map your week, convert each syllabus into tasks, study actively, and adjust your plan before you fall behind.

    Why Asynchronous Courses Need A Different Kind Of Routine

    An asynchronous course usually lets you access materials and complete coursework on your own schedule within weekly or module-based deadlines. That flexibility is useful, especially if you work, commute, care for family, or study across time zones. It also removes the built-in structure that a live class gives you. No one is making you show up at 10 a.m. on Tuesday, so your calendar has to do that job.

    The main risk is not laziness. It’s invisible workload. A recorded lecture may look like a one-hour task, but the real work includes pausing, taking notes, checking the reading, posting in a discussion board, preparing an assignment, and reviewing feedback. If you don’t assign time to those pieces, they merge into one vague task called “do class,” which is easy to postpone.

    A strong asynchronous course routine gives your week a backbone. You don’t need a perfect schedule, and you don’t need to study every day at the same minute. You need repeatable blocks, a task list you trust, and a habit of checking the course before deadlines get close. Once that rhythm exists, the course feels less like a pile of alerts and more like a normal part of your week.

    Step 1: Map Your Fixed Study Blocks For The Week

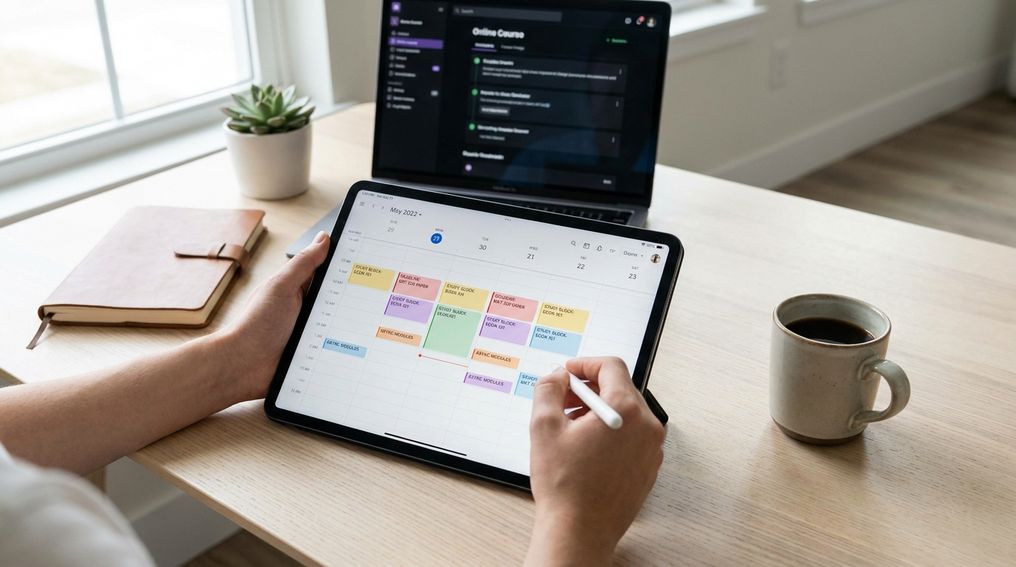
    Start by treating study time like an appointment, not a leftover activity. Put your work hours, commute, meals, sleep, family duties, and non-negotiable commitments into your calendar first. Then add fixed study blocks for each asynchronous class. If a block is not on the calendar, it will probably compete with everything else that feels urgent.

    A common college planning guideline is to expect several hours of work each week for each course, with time varying by credit load, course level, and assignment type. For a typical three-credit course, many students should plan for roughly six to nine hours across the week, then adjust after seeing the real workload. That does not mean one huge block has to carry the full course. Shorter blocks often work better because they reduce fatigue and give your brain time to process material.

    Build your first version with two or three fixed sessions per course. One session can focus on intake, readings, lecture videos, and notes. Another can handle discussion posts, practice problems, or drafting. A third can be reserved for revision, submission, and review. If your week is crowded, protect smaller blocks with clear labels: “Biology reading,” “History discussion post,” or “Statistics problem set,” not a vague label like “school.”

    Step 2: Turn Each Course Syllabus Into A Concrete Weekly Task List

    Your syllabus is not just a document to read once at the start of the term. It is the raw material for your weekly task list. Open the syllabus, learning management system, course calendar, and announcement area, then write down every recurring task. Include readings, lecture videos, quizzes, discussion posts, replies, labs, papers, exams, group work, and office hour options.

    Break large assignments into visible pieces. “Write essay” is too broad for a busy week. A better task list says: review prompt, choose topic, collect sources, outline, draft, revise, proofread, submit. The same rule applies to recorded lectures. “Watch module” becomes: watch part one, take notes, pause for practice questions, summarize main ideas, post one question for clarification.

    Once the tasks are visible, assign them to your study blocks. Put heavier thinking work into your stronger hours when possible. If mornings are better for concentration, use them for readings, writing, math, coding, or problem-solving. Use lower-energy times for organizing notes, checking announcements, formatting submissions, or reviewing instructor feedback. Your asynchronous course routine should match your real energy, not an ideal version of your day.

    Step 3: Schedule Active Learning, Not Just Watching Videos

    Watching lectures is only the intake stage. It can feel productive because the course content is moving, but understanding often stays shallow until you retrieve, explain, apply, or test the material. Active learning means you do something with the content after you receive it. That can include writing a short summary, answering practice questions, solving problems without notes, teaching the concept aloud, or comparing two ideas from the module.

    Build active learning into the same block as the lecture whenever possible. After a twenty-minute video segment, pause and write three bullet points from memory. After a reading, close the page and explain the main claim, method, or process in your own words. After a problem demonstration, solve a similar problem before moving on. These actions make gaps visible early, when you still have time to fix them.

    For courses with discussion boards, don’t treat posts as separate busywork. Use them as a study tool. Draft your first post from your notes, then use replies to test whether you can connect your idea to another student’s argument, a reading, or a course concept. If your course includes quizzes, treat each quiz as feedback about what to review, not just a grade event.

    Step 4: Set Personal Deadlines Before Official Due Dates

    Official deadlines are the last safe moment, not the best planning target. Set your personal deadline one or two days early for major assignments, discussion posts, quizzes, and projects. That buffer protects you from tech problems, surprise work shifts, family interruptions, unclear instructions, and the simple fact that some assignments take longer than expected.

    This is especially helpful when several asynchronous courses use the same weekly deadline. Many online classes organize modules around a repeated due day, often near the end of the week. If you wait until that day, every course feels urgent at once. Move your own due dates earlier so the week has stages: intake early, drafting or practice midweek, submission before the official deadline.

    Use two calendar layers if that helps. Keep the official deadline in one color and your personal deadline in another. The official date tells you the rule. Your personal date tells you the plan. When the personal deadline arrives, submit finished work when you can, or use the extra time for final checks instead of first attempts.

    Step 5: Add One Accountability Anchor Each Week

    Asynchronous learning can feel isolating because no live meeting forces contact with the instructor or classmates. Add one accountability anchor each week so the course does not exist only inside your own head. This can be a calendar reminder, a study partner check-in, an instructor question, a tutoring appointment, a discussion post goal, or a weekly progress message to someone who supports your education.

    The anchor should be simple enough to repeat. A ten-minute Friday check-in with a classmate can work better than an ambitious study group that collapses after two meetings. If you don’t know anyone in the course, use the course tools already available: discussion boards, instructor messages, office hours, tutoring centers, or academic coaching services. The goal is to create a point of contact that nudges you to stay engaged.

    Accountability also helps you catch confusion sooner. If you spend two study blocks stuck on the same concept, don’t wait until the deadline. Send a focused question: name the assignment, describe what you understand, and state exactly where you’re stuck. Instructors can respond more usefully when your question shows the work you’ve already done.

    Step 6: Review And Adjust Your Routine Every Sunday

    End each week with a short review. Fifteen minutes is enough. Open your calendar, course modules, gradebook, announcement page, and task list. Check what you completed, what rolled over, what took longer than expected, and what needs attention in the coming week.

    Use the review to adjust, not criticize yourself. If your Monday night study block failed three weeks in a row, the block is probably poorly placed. Move it. If readings always take twice as long as expected, split them across two sessions. If discussion replies keep slipping, schedule them right after your first post instead of leaving them as a separate task.

    This weekly reset is what keeps falling behind from snowballing. One missed video or late reading is manageable when you catch it quickly. Three missed modules become harder to repair. A steady Sunday review helps you see the next week before it starts, which gives your asynchronous course routine room to adapt.

    Common Mistakes That Break An Asynchronous Routine

    The first mistake is waiting for “free time.” Free time rarely appears in a clean, usable block. If you study only after every other demand has been handled, your course gets the weakest part of your day. Put study blocks on the calendar before the week fills up, then defend them the same way you would defend a work shift or appointment.

    The second mistake is confusing access with progress. Logging into the course, opening a module, or playing a lecture is not the same as learning. You need a visible output from each session: notes, solved problems, a summary, a draft, flashcards, a submitted quiz, or a question for the instructor. If a study block ends with no output, decide what will change in the next one.

    The third mistake is using too many tools. A digital calendar, one task list, and the learning management system are often enough. Adding several apps can create more maintenance than clarity. Choose tools you will actually check, then keep the system boring. Boring systems work because they reduce decisions.

    Simple Tools And Templates To Keep Your Routine Running

    Your tools should answer three questions: what is due, when will you work, and what is the next action. A digital calendar is best for time blocks and reminders. A task manager, notes app, spreadsheet, or paper planner can hold the weekly task list. Your learning management system remains the source for official instructions, announcements, grades, and submission links.

    A simple weekly template can keep everything in one place. Create sections for each course, then list deadlines, readings, videos, assignments, questions, and study blocks. Add a small “status” label beside each task: not started, working, waiting, done. This gives you a quick view of the week without reopening every course page multiple times a day.

    If you prefer a paper system, print one weekly planner and keep it near your study space. If you prefer digital tools, use calendar reminders for start times and personal deadlines. Don’t let the tool become the project. The tool exists to keep your online course time management visible, so you can spend more energy learning and less energy remembering.

    What A Good Weekly Schedule Looks Like

    A good schedule spreads the work across the week and separates intake, practice, production, and review. For one asynchronous course, Monday can be the course check-in and planning day. Tuesday or Wednesday can handle readings, lecture videos, and notes. Thursday can focus on discussion posts, problem sets, drafts, or practice. Friday or Saturday can be reserved for revisions, submissions, and a quick review.

    If you take multiple asynchronous courses, avoid stacking every course into the same type of block. Don’t watch three lectures back-to-back and call the day done. Mix the work so your brain changes gears: read for one course, solve problems for another, then revise an assignment for a third. This makes the week less monotonous and gives every course a regular touchpoint.

    Students with work or family duties can build the same rhythm with smaller sessions. A lunch break can handle announcement checks or discussion replies. A quiet evening block can handle drafting. A weekend morning can handle deeper reading or exam review. The format matters less than the repeatable pattern: check, learn, practice, produce, submit, review.

    Weekly Routine For An Asynchronous Online Course

    • Check deadlines every Monday
    • Block 2–3 study sessions per course
    • Set due dates 1–2 days early
    • Review for 15 minutes weekly

    Build A Routine You Can Actually Repeat

    A successful asynchronous course routine is not a packed calendar or a color-coded plan that falls apart after one busy week. It is a repeatable rhythm that tells you when to check the course, when to learn the material, when to produce work, and when to review your progress. Start with fixed study blocks, turn the syllabus into concrete tasks, add active learning, and set personal deadlines before the official ones. Then review the plan weekly and adjust it based on real evidence from your own schedule. Once your course has a reliable place in your week, flexibility becomes an advantage instead of a trap.


    References

  • How to Take Better Notes From Recorded Lectures

    How to Take Better Notes From Recorded Lectures

    To take better notes from recorded lectures, stop treating the recording like a script and start turning it into a retrieval tool. Strong recorded lecture notes capture main ideas, timestamps, questions, and short summaries rather than every sentence.

    Recorded lectures can help you control the pace of learning, but the pause button can also pull you into a slow transcript-making habit. This article shows you how to prepare before watching, pause with purpose, organize your notes, and review them so they actually help during exams. The goal is simple: fewer copied words, better recall, and less time lost rewatching the same lecture.

    Why Verbatim Transcription Fails For Recorded Lectures

    Writing down every word feels safe, especially when the recording can be paused and replayed. The problem is that transcription often keeps your attention on capturing language instead of understanding the idea. Mueller and Oppenheimer’s research on note-taking found that students who wrote more verbatim notes performed worse on conceptual questions than students who processed ideas in their own words. For recorded lectures, that matters because the recording makes it easy to copy too much.

    Your goal is not to preserve the lecture. The video already does that. Your notes should help you answer questions, explain ideas, solve problems, and remember what matters later. When you paraphrase, you force your brain to decide what the lecturer means, how one idea connects to another, and which details are worth keeping.

    A transcript can still help as a backup, but it shouldn’t become your main study product. If your notes are long enough that reviewing them feels like rewatching the lecture in text form, they’re too bulky. Good recorded lecture notes are shorter than the recording, easier to scan than slides, and built around the parts you need to recall. Think of them as a map back to understanding, not a word-for-word copy.

    Prepare Before You Press Play

    Better note-taking starts before the lecture begins. Spend a few minutes previewing the title, slides, learning objectives, reading guide, or course outline. This gives your brain a rough shape for the material before details start arriving. You’ll notice topic shifts sooner, and you’ll waste less time pausing for points that appear later in the slides.

    Set one note-taking goal before you watch. In a math lecture, the goal may be to understand the steps in two problem types. In a history lecture, it may be to track causes, consequences, dates, and arguments. In a biology lecture, it may be to connect terms to processes rather than copying definitions you already have in the textbook.

    Create a simple page structure before pressing play. Add the lecture title, course module, date watched if useful, and three empty sections: main ideas, questions, and timestamps. If slides are available, decide whether you’ll annotate them directly or keep a separate note page. That choice matters less than having a repeatable setup you can use every week.

    Use The Pause Button With A Plan

    The pause button should protect your thinking, not interrupt every sentence. Pause after a complete idea, a worked problem, a major slide, or a natural shift in topic. For many recorded lectures, a useful rhythm is to watch a short segment, pause, then write a brief explanation from memory. This keeps you from breaking the lecture into tiny fragments that no longer make sense.

    If a lecture is dense, use shorter chunks. If it is mostly review or discussion, use longer chunks. A practical range is often around ten to fifteen minutes, but the real signal is meaning: pause when you can answer, “What was the point of that section?” If you can’t answer, rewind a small amount and listen for structure, not isolated wording.

    Avoid pausing just to make your notes look complete. Completeness can be misleading when it turns a fifty-minute lecture into a three-hour task. Instead, write the claim, the evidence, the method, the formula, the exception, or the question the lecturer is answering. If a detail is available on the slide, don’t copy it unless you need to add meaning to it.

    Build Recorded Lecture Notes With Timestamps And Segment Summaries

    Timestamps make recorded lecture notes easier to use later. Add a timecode when the lecturer explains a hard concept, works through a problem, gives an exam hint, compares two ideas, or corrects a common mistake. You don’t need a timestamp for every slide. Use them as signposts for moments you may need to revisit.

    Pair each timestamp with a short label. A note that says “18:40 — enzyme inhibition graph explanation” is much more useful than “18:40 — important.” The label should tell your future self why that section matters. If you’re reviewing before an exam, you can jump straight to the unclear explanation instead of scrubbing through the whole video.

    At the end of each segment, write two or three sentences in your own words. Start with the main point, add one supporting detail, then include one question if anything remains unclear. This turns passive viewing into active processing. It also gives you a compact review sheet that can stand on its own without the recording open.

    Choose Note Formats That Fit Video Lectures

    The best note-taking method depends on the subject and the type of lecture. The Cornell Note-Taking System works well when you need cues, notes, and summaries on the same page. Put main notes in the large section, questions or prompts in the cue column, and a short summary at the bottom. Later, you can cover the notes and use the cues for active recall.

    Outline notes fit lectures with a clear hierarchy. Use headings for major topics, indented lines for details, and short bullets for definitions, steps, or evidence. This format works well for courses that move through organized concepts, legal reasoning, business topics, or textbook-style chapters. It can become weak if you over-indent and copy slide wording without adding your own explanation.

    Mapping notes help when the lecture connects systems, causes, processes, or theories. Put the main idea in the center and draw branches for relationships. Charting notes work better when you’re comparing categories, formulas, authors, methods, or time periods. For recorded lectures, the strongest format is often a mix: outline for structure, timestamps for location, and Cornell-style questions for review.

    Stop Copying Slides And Start Adding Meaning

    If you already have the slides, your notes should not repeat them. Slides usually contain headings, definitions, images, formulas, and prompts. Your job is to add what the slides don’t fully show: the explanation, the reasoning, the lecturer’s emphasis, and your own confusion points. A slide deck tells you what was covered; your notes should tell you what you need to understand.

    When a slide has a diagram, write what the diagram is meant to prove or explain. When a slide has a formula, write when to use it, what each variable means, and what mistake to avoid. When a slide has a list, mark the item the lecturer spent the most time on. These choices make your notes useful during review instead of turning them into a duplicate handout.

    A helpful rule is to ask, “Could these notes help me answer a test question without reopening the recording?” If the answer is no, add meaning rather than length. Write a sample question, a one-sentence explanation, a mini comparison, or a short warning about a tricky point. That kind of note earns its place.

    Review And Revise Notes For Exams

    Recorded lectures become much more useful when you review your notes soon after watching. The University of Waterloo’s learning resource on forgetting explains that new information can fade sharply without active review. A short review within twenty-four hours helps you catch gaps before they harden. It also reduces the need to rewatch full lectures later.

    Start review by closing the video and looking only at your notes. Turn headings into questions, cover the answer, and explain the idea out loud or in writing. If you used Cornell notes, use the cue column as your self-test area. If you used outline notes, convert major headings into prompts.

    Use spaced repetition for material that will appear on exams. Review the same lecture notes after a day, then again after several days, then during exam preparation. Each review should make the notes cleaner: remove clutter, highlight weak areas, add missing links, and mark items you can already recall. The best notes get shorter and sharper as the course moves forward.

    Use Tools Without Letting Tools Replace Thinking

    Digital tools can make recorded lecture notes easier to manage. A video platform may let you control playback speed, search captions, or copy a timecode. A digital notebook can keep slides, notes, images, and questions in one place. Optical Character Recognition (OCR) can help you search scanned handouts or handwritten pages after they’re uploaded.

    Transcription tools and Artificial Intelligence (AI) summaries can support your workflow, but they should not do the learning for you. A transcript can help you locate a phrase you missed. An AI-generated summary can give you a rough check after you’ve written your own notes. If you rely on those tools before thinking through the lecture yourself, you may end up with tidy text and weak recall.

    Keep your tool setup simple. Use one place for lecture notes, one naming style, and one tagging habit. A good filename could include the course, module, and lecture topic. Tags can mark exam topics, unclear ideas, formulas, readings, or discussion points, but too many tags become another form of clutter.

    Avoid Common Recorded Lecture Note-Taking Mistakes

    The most common mistake is over-pausing. If you pause after every sentence, the lecture loses flow and your notes fill with fragments. You also train yourself to depend on replay instead of listening for structure. Use pauses to process ideas, not to chase perfect capture.

    Another mistake is treating the recording as a reason to delay the work. Recorded lectures feel flexible, so they often get pushed later in the week. Set a watch time the same way you would attend a live class. If possible, pair watching with a short review session before you move to the next task.

    A third mistake is rewatching too much. Rewatching can help when a specific section is unclear, especially if you marked a timestamp. Rewatching the full lecture again and again is usually slower than reviewing notes, testing recall, and revisiting only the hard sections. Your notes should reduce rewatching, not send you back to the video every time you study.

    How Do You Take Notes From A Recorded Lecture?

    • Preview slides first
    • Pause after key ideas
    • Paraphrase, don’t transcribe
    • Add timestamps for hard parts
    • Summarize each segment
    • Review within 24 hours

    Turn The Recording Into Something You Can Actually Use

    Recorded lectures give you control, but control only helps when you use it with discipline. Preview the material, watch in meaningful chunks, write ideas in your own words, and use timestamps for the moments worth revisiting. Choose a note format that fits the subject, then revise your notes through active recall instead of rereading them passively. If your recorded lecture notes help you answer questions without replaying the full video, they’re doing their job. The best system is the one that turns a long recording into a clear, testable study tool.


    References

  • How to Stay Focused in Online Classes When No One Is Watching

    How to Stay Focused in Online Classes When No One Is Watching

    To build focus in online classes, design the class period before it starts: reduce distractions, make attention visible through notes, and add simple accountability. Strong focus in online classes comes from structure, not from waiting for willpower to appear.

    When no one is watching, your brain has to handle the lecture, the screen, the phone, the browser, the room, and the choice to stay engaged. That’s a lot for one study session. This guide shows you how to set up your space, protect your attention during class, handle video-call fatigue, and stay accountable without turning online learning into a punishment.

    Why Focus Is Harder In Online Classes

    Online classes remove many of the cues that help you pay attention in a physical classroom. There’s no walk across campus, no seat near classmates, no visible professor watching your body language, and no social pressure to keep your notebook open. Your home space may also be the same place where you sleep, eat, message friends, watch videos, and relax.

    That mix makes focus harder because your brain receives competing signals. The lecture says “learn,” your bed says “rest,” your phone says “check me,” and your open browser tabs say “leave this class for a minute.” Once you switch tasks, getting back into the lecture takes effort. You may feel like you attended class, yet still end up with weak notes and a vague memory of what was covered.

    This doesn’t mean you’re lazy or bad at online learning. It means the setup is asking you to supply your own structure. The goal is to replace classroom pressure with personal cues that make the right action easier. You don’t need a perfect study space; you need fewer decisions during class.

    Build A Distraction-Free Learning Environment Before You Log In

    Your study environment should tell your brain what job it’s about to do. If you have a desk, clear it before class and keep only the materials needed for that session. If you don’t have a desk, choose one repeatable spot and change it slightly for learning: sit upright, add a lap desk, use a tray, place your notebook beside you, or face away from visual clutter.

    Noise control matters, but silence isn’t always realistic. If family, roommates, pets, or traffic interrupt you, use headphones, low-volume background sound, or a “class in progress” note on the door. If you share a room, position your screen so movement behind you doesn’t keep pulling your eyes away. Small changes can reduce attention leaks without requiring a private office.

    Lighting and posture also help. Sit where your face and notes are easy to see, and keep your screen at a comfortable height. A bed can work if it’s truly your only option, but treat it like a study station during class. Sit upright against pillows, keep your feet grounded if possible, and avoid lying down with the laptop on your chest.

    Create A Pre-Class Routine That Signals Focus

    A pre-class routine gives your brain a clear start line. Use the same short sequence before every online class: open the course page, close unrelated windows, check the lesson topic, write the date, and list one question you want answered. This routine doesn’t need to be long. Two focused minutes can prevent twenty scattered ones.

    Think of the routine as a mental handoff from home mode to class mode. If the course is recorded, still show up at the scheduled time when you can. Recordings are useful for review, but they can also become a trap when “later” keeps moving. Live attendance gives the class a fixed place in your day.

    If your motivation is low, lower the entry barrier. Promise yourself that you only have to set up, join, and take notes for the first ten minutes. Once you’re present, staying engaged often becomes easier than starting. The hardest part is usually the shift from open-ended time to directed attention.

    Remove Phone And Browser Tabs Before They Become Temptations

    Your phone doesn’t have to ring or light up to pull attention. Research from the University of Texas at Austin found that the mere presence of a smartphone can reduce available working memory and fluid intelligence, even when the device is turned off or placed face down. During online class, that means your best phone strategy is distance, not just discipline.

    Put your phone in another room when possible. If you need it for two-factor authentication or class participation apps, keep it across the room after the required use. Turn off non-class notifications, use focus mode, or place the phone under a notebook where it’s inconvenient to grab. The goal is to add friction between the urge and the action.

    Do the same with browser tabs. Open only the course platform, lecture link, digital textbook, notes document, and approved class tools. If website blockers make you anxious, use a lighter version: block only your top two distraction sites during class time. You’re not trying to erase the internet; you’re protecting one class period.

    Stay Active During Lectures With Notes, Questions, And Retrieval

    Passive watching makes zoning out easy. Active learning gives your brain a job during the lecture. Take notes in your own words, mark confusing points, and write quick questions as they appear. You’re less likely to drift when your hands and mind are working together.

    Handwritten notes can be useful because they push you to summarize instead of typing every sentence. Research by Mueller and Oppenheimer found that students who took notes by hand performed better on conceptual learning than students who typed more verbatim notes. If you prefer digital notes, copy the same principle: don’t transcribe the lecture. Listen, shrink the idea, then write it in clear language.

    Retrieval practice helps you check whether you actually learned the material. After a section of the lecture, pause and write what you remember without looking. Turn headings into questions, cover your notes, and answer from memory. This turns online class from screen time into a learning session.

    Use Time Blocks And Breaks To Protect Attention

    Long online lectures can drain focus because screens demand steady visual and mental effort. Use time blocks to give attention a shape. A 25-minute focus timer works well for many students, followed by a short reset. If your lecture is live and you can’t leave, use the break to look away from the screen, stretch your shoulders, and relax your eyes.

    Breaks work best when they don’t become a second class of distractions. Avoid opening social media during a five-minute pause, because the switch can make returning harder. Stand up, refill water, breathe slowly, or look out a window. Keep the break boring enough that class still feels easy to return to.

    For self-paced courses, time blocks are even more useful. Decide in advance what “done” means for the session: one lecture, ten practice problems, one quiz attempt, or thirty minutes of review. Open-ended study often turns into half-watching. Clear blocks make progress measurable.

    Create Accountability When No One Is Watching

    Online learning asks you to become your own classroom monitor. That doesn’t mean you have to rely on self-control alone. Build visible accountability into the class period. Tell a classmate you’ll send your notes after lecture, join a study chat, or schedule a ten-minute review call after class.

    You can also use personal proof. At the end of class, write a three-line exit ticket: what was covered, what still feels unclear, and what you’ll review later. This takes less than two minutes and shows whether you were truly present. If your notes are empty, the exit ticket makes that visible right away.

    Accountability can be private, too. Use a simple class tracker with checkboxes for attendance, notes, review, and practice. Don’t track everything. Track the behaviors that lead to learning. A short record helps you spot patterns before grades make the problem obvious.

    Manage Zoom Fatigue Without Skipping Class

    Video-call fatigue is real, and it has identifiable causes. Stanford research points to excessive eye contact, constant self-evaluation on video, reduced physical movement, and extra mental effort reading nonverbal cues as contributors. If online class leaves you tired but foggy, the issue may be the video format as much as the course content.

    Start by hiding your self-view if your platform allows it. You don’t need to watch your own face for an entire lecture. Reduce the video window size when appropriate, sit farther from the screen, and switch to speaker view if gallery view feels draining. These changes reduce visual pressure without skipping class.

    Movement also matters. Keep your camera expectations in mind, then adjust within the rules. If cameras are optional, turn yours off during note-heavy portions and stay engaged through chat, polls, or written questions. If cameras are required, shift posture, stretch below the camera line, and use breaks to stand up.

    Adjust For Attention Differences And Know When To Ask For Help

    If you have Attention-Deficit/Hyperactivity Disorder (ADHD), anxiety, a learning difference, or another attention-related challenge, generic focus advice can feel unrealistic. Make the strategies smaller and more external. Use timers, checklists, body doubling, screen blockers, printed notes, captions, or scheduled check-ins. The less you rely on memory, the better.

    You can also make class participation more concrete. Keep a “parking lot” page for distracting thoughts, errands, and ideas that pop up during lecture. Write them down quickly and return to class instead of following the thought. This gives your brain permission to release the idea without acting on it.

    Ask for support when focus problems keep blocking your work. Contact your instructor, academic adviser, tutoring center, disability services office, or learning center. You don’t need to wait until you’re failing. Useful support can include note-taking help, testing adjustments, coaching, deadline planning, or clearer study routines.

    Use Review Sessions So Class Time Turns Into Learning

    Focus during class matters, but learning sticks better when you revisit material. Spaced practice means reviewing across multiple shorter sessions instead of cramming in one long block. The American Psychological Association and The Learning Scientists identify spacing and self-testing as strong learning strategies. This is especially useful for online classes, where it’s easy to mistake watching for knowing.

    Schedule a short review within a day of class. Open your notes, cover them, and write what you remember. Then compare your answer to the notes and fill gaps in a different color. This gives you fast feedback before confusion grows.

    Use your class recordings with purpose. Don’t rewatch the whole lecture unless you truly need to. Go to the timestamp tied to a confusing note, replay that section, and answer a specific question. Recorded class should be a repair tool, not a replacement for attention.

    How Can I Stay Focused During Online Classes?

    • Put your phone in another room.
    • Close unrelated browser tabs.
    • Sit at a desk, not in bed.
    • Take notes by hand.
    • Use a 25-minute focus timer.

    Keep Your Attention Where The Learning Happens

    Staying focused when no one is watching starts with making distraction harder and learning easier. Set up your space before class, remove the phone when you can, close extra tabs, and give your brain an active job through notes and self-testing. Use breaks and video settings to reduce fatigue instead of letting tiredness turn into skipped lectures. If attention has been hard for a long time, get support early and use tools that make focus visible. Online class can feel unstructured, but you can build enough structure around it to stay present and learn what you came to learn.


    References

  • From Passive to Proactive: Active Learning Techniques for the Digital Age

    From Passive to Proactive: Active Learning Techniques for the Digital Age

    Active learning techniques help students move beyond passively consuming digital content by requiring them to question, discuss, retrieve, apply, and create. This shift matters because logging in, watching a video, or completing a reading doesn’t prove that a learner understands the material.

    Digital tools can support deeper participation, but technology only helps when it serves a clear learning purpose. This article explains how to design practical, engaging learning experiences without overwhelming students or instructors.

    What Does Active Learning Mean In The Digital Age?

    Active learning techniques move students from watching, listening, and clicking through content to questioning, discussing, applying, and creating with it. In digital learning, that means using technology to make learners do meaningful thinking during class, before class, and after class.

    If your students log in, mute themselves, and let slides pass by, they may be present without being mentally engaged. The goal isn’t to add more apps or make every lesson flashy. The goal is to design moments where students retrieve information, test ideas, explain reasoning, compare answers, and solve problems.

    Research on active learning shows why this matters. A major analysis of science, technology, engineering, and mathematics courses found that active learning raised exam performance and reduced failure rates compared with traditional lecturing. That doesn’t mean lectures have no place. It means lectures work better when you interrupt passive intake with structured participation.

    What Is The Difference Between Passive And Active Learning?

    Passive learning asks students to receive information. Active learning asks students to process, use, and respond to information before the lesson moves on.

    Passive digital learning often looks efficient from the instructor side. You upload slides, record a video, assign a reading, and students consume it on their own time. The problem is that consumption doesn’t prove understanding. A student can finish a video, highlight a page, or sit through a lecture without being able to explain the idea independently.

    Active digital learning changes the student’s role. Instead of asking, “Did you watch it?” you ask, “Can you apply it, question it, teach it, or use it to make a decision?” That shift can be simple: a poll after a short explanation, a shared document where students compare responses, a short quiz using active recall, or a discussion prompt that requires evidence rather than opinion.

    You don’t need to remove direct instruction. You need to break it into shorter teaching moments followed by learner action. A ten-minute explanation paired with a two-minute poll and a five-minute peer discussion usually gives you more useful learning data than a thirty-minute uninterrupted lecture.

    Why Are Active Learning Techniques Important For Student Engagement?

    Active learning techniques matter because they make engagement visible. You can see what students understand, where they’re stuck, and who needs support before the final assessment arrives.

    Student disengagement is not only a motivation issue. It’s often a design issue. If learners are asked to sit, watch, and absorb for long stretches, many will drift, especially in digital spaces where distractions sit one tab away. Active tasks give students a reason to return attention to the learning goal.

    Engagement also improves when students feel responsible for contributing. Live polls, peer explanation, collaborative notes, problem-solving boards, and reflection prompts all create small moments of accountability. These moments don’t need to be graded every time. They need to signal that participation is part of learning, not an optional add-on.

    Gallup’s student engagement findings show that many students feel disconnected from school. Digital active learning can help when it makes participation easier, safer, and more frequent. A quiet student who rarely speaks in class may contribute through a shared document, anonymous poll, or short written response before joining a discussion.

    What Are The Best Active Learning Techniques For Online Classes?

    The best techniques for online classes are the ones that make students retrieve, explain, collaborate, and apply ideas. Start with simple routines before adding advanced tools.

    Live polling works well because it interrupts passive listening and gives you instant feedback. Ask a concept question, display the response pattern, then discuss why answers differ. The value is not the poll itself. The learning happens when students compare reasoning and correct misunderstandings.

    Think-pair-share also adapts well online. Students think independently, discuss in pairs or small breakout groups, then share a response with the full class. In asynchronous courses, you can adapt the same pattern by asking students to post an initial answer, respond to a peer, then revise their original answer.

    Collaborative documents support group thinking without requiring every student to speak aloud. Students can build a shared glossary, annotate a reading, sort examples into categories, or create a problem-solving plan. This keeps the activity visible, which helps you monitor progress and intervene without taking over the room.

    How Does The Flipped Classroom Model Work?

    The flipped classroom moves basic content exposure before class and uses class time for practice, discussion, feedback, and application. Students prepare outside class, then work actively when instructor support is available.

    A flipped lesson works best when pre-work is short and purposeful. A long video rarely solves the passivity problem. A better design uses a short video, reading excerpt, or demonstration followed by a quick retrieval task that checks readiness.

    Class time should then focus on the work students struggle to do alone. That could mean solving problems, analyzing a source, applying a process, debating a claim, or building a project plan. The instructor’s role shifts from delivering every detail to diagnosing confusion and guiding practice.

    Set expectations early. Students need to know that pre-work matters because class depends on it. If they arrive unprepared and can still sit quietly through the session, the flipped model loses its force. Use low-stakes checks, short reflections, or entry questions to make preparation visible.

    Can Gamification Improve Learning Retention?

    Gamification can support retention when it reinforces recall, feedback, progress, and practice. It works best when game elements serve the learning goal rather than distract from it.

    Quizzes, badges, progress bars, challenge levels, and timed review rounds can motivate students to return to material. The strongest use is retrieval practice. When students repeatedly pull information from memory, identify errors, and correct them, they strengthen learning more than they would through rereading alone.

    Keep the design fair and focused. Competitive leaderboards can energize some students and discourage others. Team challenges, personal progress tracking, and mastery levels often create broader participation because students can improve without feeling publicly ranked.

    The growth of the educational gamification market reflects strong interest in this area, but market growth alone doesn’t prove learning quality. Your measure should be whether students remember more, explain better, and transfer knowledge to new tasks. If the game mechanic doesn’t support those outcomes, simplify it.

    What Digital Tools Help Make Lectures More Interactive?

    The right tools help students respond, collaborate, practice, and reflect. Choose tools based on the learning action you want, not the novelty of the platform.

    For quick checks, use polling, quiz, or classroom response tools. These help you spot misconceptions during the lesson rather than after grading. Ask questions that reveal reasoning, not only recall. A good poll can show whether students understand a concept well enough to apply it.

    For collaboration, shared documents, whiteboards, discussion boards, and learning management system tools can work well. Students can co-create notes, compare solutions, map arguments, or build group responses. Keep instructions precise so the tool doesn’t become the task. The task is the thinking students do inside the tool.

    For reflection and self-directed learning, short journals, exit tickets, audio responses, and learning portfolios can help students track progress. These tools are useful when you ask focused prompts: what changed in your understanding, where did you get stuck, what evidence supports your answer, or what step would you take differently?

    How Do You Choose Technology Without Overcomplicating Your Class?

    Choose technology by matching one tool to one learning purpose. If a tool doesn’t help students think, practice, collaborate, or get feedback, you probably don’t need it.

    Start with your instructional goal. If you need to check understanding, use a poll or quiz. If you need students to build ideas together, use a shared workspace. If you need deeper practice, use a simulation, case task, or problem-based activity. Tool choice should follow the learning need.

    Limit the number of platforms students must manage. Too many logins, dashboards, and submission points can reduce focus. Reuse familiar tools in different ways so students spend less time learning software and more time learning the subject.

    Access matters. Some students have limited devices, unstable bandwidth, or shared study spaces. Offer low-bandwidth options where possible: downloadable files, text-based prompts, flexible submission formats, and activities that don’t require constant video. Good digital pedagogy works for real students, not ideal conditions.

    How Can You Measure Active Learning Beyond Standard Tests?

    You can measure active learning by tracking participation quality, concept mastery, transfer, reflection, collaboration, and revision. Standard tests can help, but they shouldn’t be your only evidence.

    Use formative assessment during learning. Poll results, exit tickets, draft responses, peer explanations, short quizzes, and discussion patterns can show what students understand before high-stakes grading. This lets you adjust instruction sooner.

    Look for transfer. Can students use a concept in a new problem, different reading, unfamiliar data set, or practical decision? If students can only repeat what they heard, learning may still be shallow. Active learning should help them move from recognition to application.

    Reflection also gives you valuable evidence. Ask students to explain how their answer changed, what feedback they used, or which step caused confusion. These responses help you see the learning process, not just the final product.

    How Do You Handle Student Pushback And Instructor Overload?

    Student pushback often comes from unclear expectations. Instructor overload often comes from changing too much at once. Solve these problems with small, repeated routines.

    Some students expect digital learning to mean watching content and submitting assignments. When you ask them to participate more actively, they may see it as extra work. Explain the purpose plainly: active tasks help them practice before grades depend on performance. Then keep the routine consistent enough that it becomes normal.

    For instructors, the fastest path is not a total course redesign. Add one active moment to each major lesson. A poll, retrieval prompt, peer explanation, or collaborative note-taking task can change the rhythm without rebuilding every material.

    Teacher confidence grows through repetition. ISTE and Project Tomorrow reported that many teachers see educational technology as a way to move from lecturer to facilitator. That shift doesn’t require giving up structure. It requires designing structure that students actively use.

    What Are Active Learning Techniques In The Digital Age?

    • Live polls during lectures
    • Gamified recall quizzes
    • Peer discussion boards
    • Flipped video pre-work
    • Digital problem-solving tasks

    Build A Proactive Learning Culture One Routine At A Time

    Active learning techniques work best when they become part of the learning culture, not a one-day experiment. Start small, use tools with purpose, and make student thinking visible through polls, discussions, retrieval practice, collaboration, and applied tasks. Keep lectures where they help, but don’t let them become the only mode of learning. When students know they’ll be asked to think, respond, revise, and explain, digital learning becomes less passive and more productive. The strongest shift is simple: design every lesson so students do something meaningful with what they’re learning.


    References

  • Top 5 Crowdfunding Platforms and the Surprising Projects They Funded

    Top 5 Crowdfunding Platforms and the Surprising Projects They Funded

    Crowdfunding platforms can turn strange, practical, personal, and risky ideas into funded public moments when enough people care enough to contribute. A joke about potato salad, a backyard beehive, a political infrastructure campaign, a scrappy podcast, and autonomous security robots all found real money from online backers.

    If you’re comparing crowdfunding platforms, the surprising part isn’t only how much money changed hands. It’s how different the crowd’s motivations can be: humor, curiosity, identity, trust, urgency, or belief in a future product. This article walks through five major platforms, what they’re built for, and the unexpected projects that made people pay attention.

    What Makes A Crowdfunding Platform Different?

    Crowdfunding platforms don’t all solve the same funding problem. Some help creators pre-sell a product or reward, some help people raise donations, some support ongoing memberships, and some let startup supporters invest in companies. Before you choose one, you need to match the platform to the kind of relationship you want with your backers.

    Reward-based crowdfunding works best when backers expect a product, experience, or creative reward. Donation-based crowdfunding fits personal causes, community needs, and urgent financial support. Membership crowdfunding helps creators earn recurring income from fans, and equity crowdfunding is built for startup fundraising where backers accept business risk.

    The fee models also differ. Kickstarter and Indiegogo both use platform fees plus payment processing fees, GoFundMe has no platform fee for personal campaigns in the United States but still charges payment processing, Patreon takes a percentage of creator income depending on the plan, and SeedInvest uses startup funding arrangements that vary by raise. Low fees matter, but fit matters more. A lower-fee platform won’t help if your audience doesn’t understand why they should fund you there.

    1. Kickstarter And The Joke That Raised $55,000

    Kickstarter is built for creative, reward-based projects, and it’s known for games, films, design products, music, publishing, and invention campaigns. Its all-or-nothing model means a project only receives money if it reaches its funding goal. That structure can create urgency, but it also forces creators to prove demand before they receive funds.

    The surprising Kickstarter case is Zack Danger Brown’s “Potato Salad” campaign. The stated goal was simple: he wanted to make potato salad. The campaign raised $55,492 from 6,911 backers, which turned a tiny joke into a public event, a party, and a scholarship effort.

    That campaign worked because it was easy to understand, easy to share, and funny without needing a long pitch. Most campaigns can’t rely on absurdity alone, but the lesson still applies: people back projects they can explain quickly. If your idea needs five minutes before anyone “gets it,” you’ll need clearer positioning, better visuals, or a stronger reward ladder.

    2. Indiegogo: How A Backyard Idea Revolutionized Beekeeping

    Indiegogo gives campaign owners more funding flexibility than many reward-based platforms. It supports product launches, technology, design, community projects, and creative campaigns, with options that can include flexible funding or all-or-nothing funding. That flexibility can help teams that can still move forward after missing a full target, but it also places more responsibility on backers to review delivery risk.

    Flow Hive became one of Indiegogo’s most surprising wins because it wasn’t another phone accessory or sleek gadget. It was a beehive design that let honey flow from the hive with less disruption to the bees. The campaign raised $12.2 million against a much smaller original goal, showing that a practical agritech idea could attract global attention.

    The surprise came from the category mismatch. Many people expect Indiegogo hits to look like consumer electronics. Flow Hive showed that a project connected to nature, food, and backyard self-reliance could break through if the demonstration was visual and the benefit was immediate. If you’re launching a product, that’s the bar: show the result, reduce confusion, and make the backer feel the problem before asking for money.

    3. GoFundMe: When A Private Citizen Tried To Build A Wall

    GoFundMe is best known for donation-based crowdfunding. People use it for personal causes, medical expenses, memorial funds, education costs, community support, and urgent needs. Backers usually give because they care about the person, cause, or outcome, not because they expect a product reward.

    One of its most surprising campaigns was “We the People Will Fund the Wall,” a private fundraising effort tied to the U.S.-Mexico border wall. The campaign raised over $25 million from hundreds of thousands of donors. It stood out because a private individual used a personal fundraising platform to pursue a massive public infrastructure idea.

    The campaign also shows why donation crowdfunding needs trust, clarity, and realistic expectations. Donors may respond quickly to a bold idea, but campaign mechanics, goal size, and legal or administrative barriers can affect whether funds can be used as expected. If you’re donating, read the organizer details, refund policy, stated use of funds, and updates before contributing.

    4. Patreon: The Raucous Podcast That Out-Earned Media Giants

    Patreon is different from one-time fundraising sites because it’s designed for recurring creator support. Fans become patrons, usually paying monthly for access, bonus material, community benefits, or the simple desire to keep a creator working. That makes Patreon better for ongoing creative output than one-off product launches.

    ChapoTrapHouse became a standout Patreon case because a niche political comedy podcast turned into a major membership-funded media operation. At its peak, the show earned over $170,000 per month from about 37,000 patrons. The surprise wasn’t polish; it was loyalty, voice, and a fan base willing to pay directly for a show outside traditional media channels.

    If you’re asking whether you can make a living on Patreon, the honest answer is: some creators can, many don’t. Recurring support depends on consistency, audience trust, and a clear reason to stay subscribed. A viral launch can help, but monthly retention is built through reliable output and rewards that don’t burn out the creator.

    5. SeedInvest: When Retail Investors Funded A Robot Army

    SeedInvest sits in a different category from reward, donation, and membership platforms. It focuses on startup investment, meaning backers are not buying a mug, a game, or bonus podcast episodes. They’re participating in startup fundraising and accepting the risk that comes with early-stage companies.

    Knightscope became a surprising SeedInvest story by raising $20 million for autonomous security robots. The company’s machines were egg-shaped, roughly 400 pounds, and built for security patrol use. The striking part was that a futuristic robotics pitch reached retail investors through online startup fundraising rather than relying only on traditional venture capital channels.

    This kind of crowdfunding carries a different risk profile. A delayed reward is frustrating, but a startup investment can lose value or fail outright. If you’re considering equity crowdfunding, review the business model, revenue history, risk disclosures, use of funds, team background, and your own ability to absorb a loss.

    What These Five Crowdfunding Platforms Reveal About Backer Psychology

    The most surprising campaigns rarely win because they check every formal business box. They win because the idea creates an instant reaction. People laugh, feel useful, see a clever fix, join a group identity, or bet on a future they want to see.

    That doesn’t mean planning is optional. Potato Salad was shareable, Flow Hive was visual, the wall campaign was emotionally charged, ChapoTrapHouse had a loyal audience, and Knightscope had a bold future-facing product. Each campaign gave backers a story they could repeat without needing a pitch deck.

    If you want to evaluate a campaign, ask what’s driving the money. Is it a product need, personal trust, entertainment value, community belonging, or investment upside? Once you identify the motivation, you can judge whether the campaign’s promise matches the platform’s structure.

    How To Compare Crowdfunding Platforms Before You Back Or Launch

    Start with the funding type. If you’re launching a creative product, Kickstarter or Indiegogo may fit. If you’re raising money for a personal cause, GoFundMe is usually closer to donor expectations. If you create ongoing content, Patreon fits recurring support, and if you’re raising startup capital, SeedInvest belongs in the equity crowdfunding category.

    Then review the risk. Reward campaigns can face manufacturing delays, shipping problems, underpriced budgets, or product changes. Donation campaigns depend on organizer trust and clear fund use. Membership projects depend on creator consistency, and startup investments carry business risk from day one.

    Fees deserve attention, but don’t choose on fees alone. A campaign with the right audience on a slightly costlier platform can outperform a cheaper platform with poor fit. Good platform choice starts with backer intent: are people buying, donating, subscribing, or investing?

    Could Your Idea Be The Next Surprise Hit? Lessons From The Unlikely Winners

    A surprise hit usually has one sharp hook. It can be absurd, useful, bold, comforting, funny, or futuristic, but it needs to be clear enough for strangers to share. Crowdfunding rewards speed of understanding, especially when a campaign depends on social sharing.

    Build your campaign around proof. That can mean a working prototype, a clear project budget, founder credibility, consistent updates, or a track record with an audience. Backers don’t need perfection, but they do need enough confidence to believe you can do what you promised.

    You should also plan for success before you ask for attention. Many creators prepare for missing a goal but underestimate the strain of exceeding one. If demand jumps, you need supplier capacity, customer support, tax planning, communication discipline, and a realistic delivery plan.

    What Are The Most Surprising Crowdfunding Projects Ever?

    • Potato Salad, Kickstarter: $55,492
    • Flow Hive, Indiegogo: $12.2M
    • Border wall, GoFundMe: $25M raised
    • ChapoTrapHouse, Patreon: $170K/month
    • Knightscope robots, SeedInvest: $20M

    The Real Lesson Behind These Crowdfunding Platforms

    The best crowdfunding platforms don’t just process payments; they reveal what people are willing to support before a bank, publisher, studio, or investor says yes. Kickstarter showed that a joke could become a community event, Indiegogo proved a beehive could compete with gadgets, GoFundMe showed the scale of donation-driven attention, Patreon turned fan loyalty into recurring creator income, and SeedInvest brought futuristic robotics into retail startup funding. If you’re backing a campaign, judge the promise, the people, and the risk before you pay. If you’re launching one, make the idea easy to repeat, the plan easy to trust, and the platform match the kind of support you need.


    References