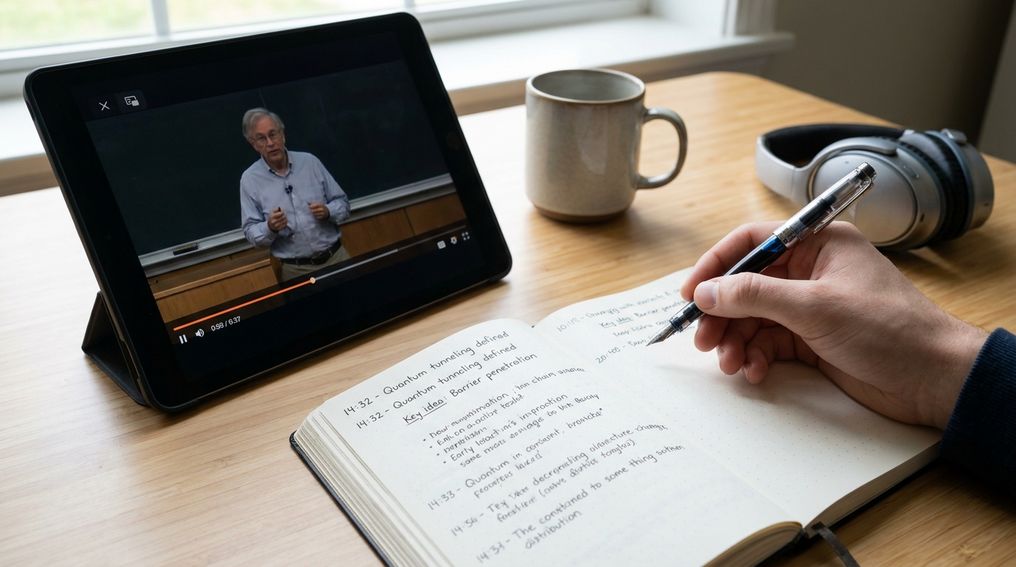
To take better notes from recorded lectures, stop treating the recording like a script and start turning it into a retrieval tool. Strong recorded lecture notes capture main ideas, timestamps, questions, and short summaries rather than every sentence.
Recorded lectures can help you control the pace of learning, but the pause button can also pull you into a slow transcript-making habit. This article shows you how to prepare before watching, pause with purpose, organize your notes, and review them so they actually help during exams. The goal is simple: fewer copied words, better recall, and less time lost rewatching the same lecture.
Why Verbatim Transcription Fails For Recorded Lectures
Writing down every word feels safe, especially when the recording can be paused and replayed. The problem is that transcription often keeps your attention on capturing language instead of understanding the idea. Mueller and Oppenheimer’s research on note-taking found that students who wrote more verbatim notes performed worse on conceptual questions than students who processed ideas in their own words. For recorded lectures, that matters because the recording makes it easy to copy too much.
Your goal is not to preserve the lecture. The video already does that. Your notes should help you answer questions, explain ideas, solve problems, and remember what matters later. When you paraphrase, you force your brain to decide what the lecturer means, how one idea connects to another, and which details are worth keeping.
A transcript can still help as a backup, but it shouldn’t become your main study product. If your notes are long enough that reviewing them feels like rewatching the lecture in text form, they’re too bulky. Good recorded lecture notes are shorter than the recording, easier to scan than slides, and built around the parts you need to recall. Think of them as a map back to understanding, not a word-for-word copy.
Prepare Before You Press Play
Better note-taking starts before the lecture begins. Spend a few minutes previewing the title, slides, learning objectives, reading guide, or course outline. This gives your brain a rough shape for the material before details start arriving. You’ll notice topic shifts sooner, and you’ll waste less time pausing for points that appear later in the slides.
Set one note-taking goal before you watch. In a math lecture, the goal may be to understand the steps in two problem types. In a history lecture, it may be to track causes, consequences, dates, and arguments. In a biology lecture, it may be to connect terms to processes rather than copying definitions you already have in the textbook.
Create a simple page structure before pressing play. Add the lecture title, course module, date watched if useful, and three empty sections: main ideas, questions, and timestamps. If slides are available, decide whether you’ll annotate them directly or keep a separate note page. That choice matters less than having a repeatable setup you can use every week.
Use The Pause Button With A Plan
The pause button should protect your thinking, not interrupt every sentence. Pause after a complete idea, a worked problem, a major slide, or a natural shift in topic. For many recorded lectures, a useful rhythm is to watch a short segment, pause, then write a brief explanation from memory. This keeps you from breaking the lecture into tiny fragments that no longer make sense.
If a lecture is dense, use shorter chunks. If it is mostly review or discussion, use longer chunks. A practical range is often around ten to fifteen minutes, but the real signal is meaning: pause when you can answer, “What was the point of that section?” If you can’t answer, rewind a small amount and listen for structure, not isolated wording.
Avoid pausing just to make your notes look complete. Completeness can be misleading when it turns a fifty-minute lecture into a three-hour task. Instead, write the claim, the evidence, the method, the formula, the exception, or the question the lecturer is answering. If a detail is available on the slide, don’t copy it unless you need to add meaning to it.
Build Recorded Lecture Notes With Timestamps And Segment Summaries
Timestamps make recorded lecture notes easier to use later. Add a timecode when the lecturer explains a hard concept, works through a problem, gives an exam hint, compares two ideas, or corrects a common mistake. You don’t need a timestamp for every slide. Use them as signposts for moments you may need to revisit.
Pair each timestamp with a short label. A note that says “18:40 — enzyme inhibition graph explanation” is much more useful than “18:40 — important.” The label should tell your future self why that section matters. If you’re reviewing before an exam, you can jump straight to the unclear explanation instead of scrubbing through the whole video.
At the end of each segment, write two or three sentences in your own words. Start with the main point, add one supporting detail, then include one question if anything remains unclear. This turns passive viewing into active processing. It also gives you a compact review sheet that can stand on its own without the recording open.
Choose Note Formats That Fit Video Lectures
The best note-taking method depends on the subject and the type of lecture. The Cornell Note-Taking System works well when you need cues, notes, and summaries on the same page. Put main notes in the large section, questions or prompts in the cue column, and a short summary at the bottom. Later, you can cover the notes and use the cues for active recall.
Outline notes fit lectures with a clear hierarchy. Use headings for major topics, indented lines for details, and short bullets for definitions, steps, or evidence. This format works well for courses that move through organized concepts, legal reasoning, business topics, or textbook-style chapters. It can become weak if you over-indent and copy slide wording without adding your own explanation.
Mapping notes help when the lecture connects systems, causes, processes, or theories. Put the main idea in the center and draw branches for relationships. Charting notes work better when you’re comparing categories, formulas, authors, methods, or time periods. For recorded lectures, the strongest format is often a mix: outline for structure, timestamps for location, and Cornell-style questions for review.
Stop Copying Slides And Start Adding Meaning
If you already have the slides, your notes should not repeat them. Slides usually contain headings, definitions, images, formulas, and prompts. Your job is to add what the slides don’t fully show: the explanation, the reasoning, the lecturer’s emphasis, and your own confusion points. A slide deck tells you what was covered; your notes should tell you what you need to understand.
When a slide has a diagram, write what the diagram is meant to prove or explain. When a slide has a formula, write when to use it, what each variable means, and what mistake to avoid. When a slide has a list, mark the item the lecturer spent the most time on. These choices make your notes useful during review instead of turning them into a duplicate handout.
A helpful rule is to ask, “Could these notes help me answer a test question without reopening the recording?” If the answer is no, add meaning rather than length. Write a sample question, a one-sentence explanation, a mini comparison, or a short warning about a tricky point. That kind of note earns its place.
Review And Revise Notes For Exams
Recorded lectures become much more useful when you review your notes soon after watching. The University of Waterloo’s learning resource on forgetting explains that new information can fade sharply without active review. A short review within twenty-four hours helps you catch gaps before they harden. It also reduces the need to rewatch full lectures later.
Start review by closing the video and looking only at your notes. Turn headings into questions, cover the answer, and explain the idea out loud or in writing. If you used Cornell notes, use the cue column as your self-test area. If you used outline notes, convert major headings into prompts.
Use spaced repetition for material that will appear on exams. Review the same lecture notes after a day, then again after several days, then during exam preparation. Each review should make the notes cleaner: remove clutter, highlight weak areas, add missing links, and mark items you can already recall. The best notes get shorter and sharper as the course moves forward.
Use Tools Without Letting Tools Replace Thinking
Digital tools can make recorded lecture notes easier to manage. A video platform may let you control playback speed, search captions, or copy a timecode. A digital notebook can keep slides, notes, images, and questions in one place. Optical Character Recognition (OCR) can help you search scanned handouts or handwritten pages after they’re uploaded.
Transcription tools and Artificial Intelligence (AI) summaries can support your workflow, but they should not do the learning for you. A transcript can help you locate a phrase you missed. An AI-generated summary can give you a rough check after you’ve written your own notes. If you rely on those tools before thinking through the lecture yourself, you may end up with tidy text and weak recall.
Keep your tool setup simple. Use one place for lecture notes, one naming style, and one tagging habit. A good filename could include the course, module, and lecture topic. Tags can mark exam topics, unclear ideas, formulas, readings, or discussion points, but too many tags become another form of clutter.
Avoid Common Recorded Lecture Note-Taking Mistakes
The most common mistake is over-pausing. If you pause after every sentence, the lecture loses flow and your notes fill with fragments. You also train yourself to depend on replay instead of listening for structure. Use pauses to process ideas, not to chase perfect capture.
Another mistake is treating the recording as a reason to delay the work. Recorded lectures feel flexible, so they often get pushed later in the week. Set a watch time the same way you would attend a live class. If possible, pair watching with a short review session before you move to the next task.
A third mistake is rewatching too much. Rewatching can help when a specific section is unclear, especially if you marked a timestamp. Rewatching the full lecture again and again is usually slower than reviewing notes, testing recall, and revisiting only the hard sections. Your notes should reduce rewatching, not send you back to the video every time you study.
How Do You Take Notes From A Recorded Lecture?
- Preview slides first
- Pause after key ideas
- Paraphrase, don’t transcribe
- Add timestamps for hard parts
- Summarize each segment
- Review within 24 hours
Turn The Recording Into Something You Can Actually Use
Recorded lectures give you control, but control only helps when you use it with discipline. Preview the material, watch in meaningful chunks, write ideas in your own words, and use timestamps for the moments worth revisiting. Choose a note format that fits the subject, then revise your notes through active recall instead of rereading them passively. If your recorded lecture notes help you answer questions without replaying the full video, they’re doing their job. The best system is the one that turns a long recording into a clear, testable study tool.
Leave a Reply